How to Fix Christmas Light Strings: Easy Step-by-Step Guide
When the festive season is just around the corner, few things can dampen your holiday spirit more than a string of Christmas lights that just won't work. Whether your lights have gone dark as if they've been benched by the circuit breaker, or a section of bulbs stubbornly refuses to glow despite your best troubleshooting efforts, knowing exactly how to fix Christmas light strings can save your décor-and your holiday mood. In this guide, you'll learn practical steps, essential tools, and expert tips, informed by reviews, to repair these strings safely, efficiently, and with a dash of humor along the way. You'll also discover how to use a multimeter to check for electrical faults, understand why a fuse may blow, and get advice that any electrician would approve of. By the end of this article, you'll be confidently handling electronics and wiring like a holiday decorating pro, ensuring that your home shines bright this season.
Transitioning from the dreaded dark string to a twinkling wonder is simpler than you might think, and with our easy step-by-step process, you'll be up and running faster than you can say "The Christmas Light Emporium." Now, let's dive into identifying the common problems and get started on your journey to fixing that pesky string of electric light.
Identifying Common Christmas Light String Problems
Understanding the specific issues with your Christmas lights is crucial before you roll up your sleeves and start fiddling with wires and bulbs. In many cases, a string may stop working entirely, exhibit dimming or flickering behavior, or have certain sections that refuse to light up at all. Here's why these issues might pop up and how to identify them.
Understanding Why Your Entire Light String Is Out
When every single bulb goes dark, the problem is often with the power source or the main connection at the plug. This can be due to a blown fuse in the plug, a tripped circuit breaker in your home's electrical panel, or even damaged wiring along the string. Sometimes, the problem is simply a loose connection where the plug meets the socket. Often, using a multimeter can help you pinpoint whether the current is reaching your light string. If you find that no voltage is present at the input, then it's likely that there's a problem with your house's electrical outlet or an issue with your extension cord. In such cases, it's important to ensure that the outlet is functioning by testing it with another device. Another common culprit is a faulty power strip that might not be delivering proper power. Always start by checking the simplest components first-like swapping out the outlet or using another known good extension cord-before you move on to more intricate repairs.
Diagnosing a Section of Lights That Is Not Working
Sometimes only a portion of your light string is dark while the rest still glows merrily. This suggests a more localized problem, typically along a faulty branch or within a specific segment of wiring. The issue might be due to a burnt-out bulb that disrupts the series circuit of incandescent lights, effectively breaking the continuity for the rest of the string. In many cases, replacing even a single defective bulb or fixing the small connection leads to restoring the entire section. To diagnose, work systematically along the string and press lightly on each bulb's socket to check if a loose bulb might be the problem. If a section remains unlit, use a combination of visual inspection and a light tester designed specifically for Christmas lights - like the LED Keeper Pro for LED Christmas lights. This tool can quickly help you identify which bulb or section is causing the problem without having to remove every single bulb. Additionally, systematic checks with a multimeter across the problematic area can pinpoint whether current is leaking or if the wiring is corroded, which is common if the lights have been stored improperly over several winters.
- Pro Tip: If you are using high quality, fully rectified LED light strings, the most common problem is with the rectifier. The rectifier is what removes the natural flicker that occurs with economical, non rectified LED strings. it essential doubles the frequency at of the electricity being send to each LED diode from 60hz to 120hz, making the flickering so fast it is not perceptible to the human eye. A rectifier is that little 'bulbus-looking" 'pod' that you find in the middle, one end near the plugs, or all of these locations, on a pro grade LED light string. If it goes bad - and they often do - you will notice that half the string (beyond the rectifier in terms of electrical flow) stops working. Unfortunately, this is the most common reason for LED light string failure. And it generally isn't fixable. Luckily, it's not very common that pro grade LED light strings fail. So reach out to your retailer and let them cover a replacement for you under warranty.
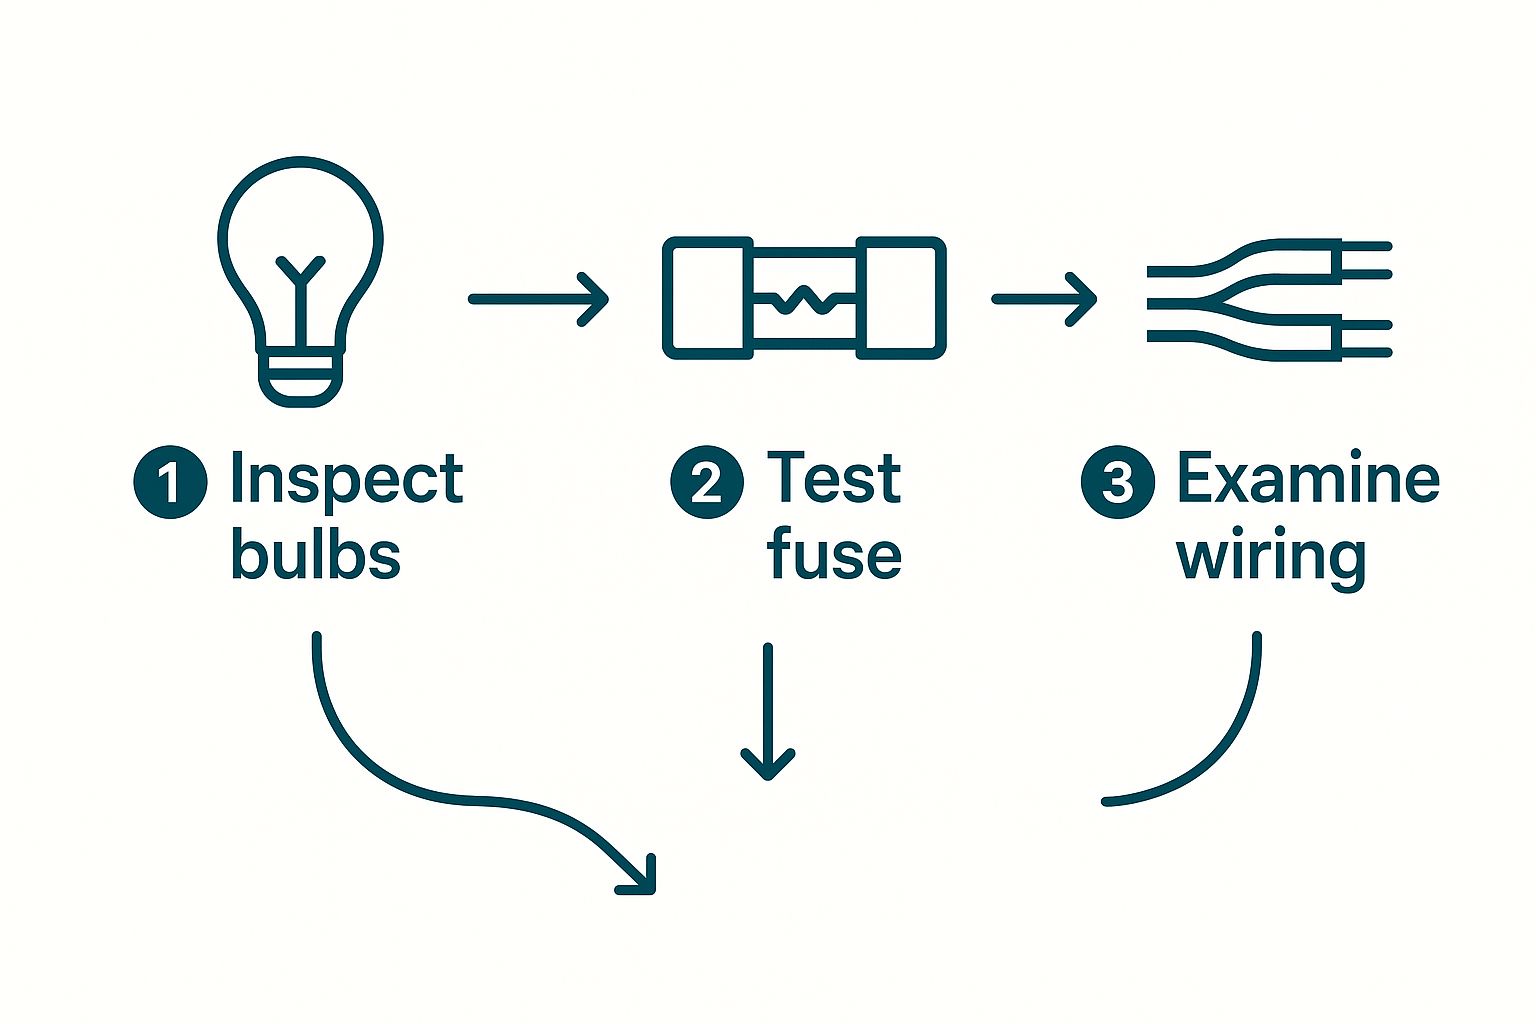
This infographic shows the three main steps in Christmas light troubleshooting: inspecting the bulbs, checking the fuse, and examining the wiring. The flow chart illustrates the logical progression of the diagnostic process. It starts with the most common and simplest fix-checking the bulbs-and moves on to more involved issues such as wiring faults.
Addressing Flickering or Dimming Christmas Lights
Flickering or dimming lights indicate an intermittent connection or voltage fluctuation (OR a economical set of LED lights that doesn't have a rectifier!) One common cause is corrosion within the wires or sockets, particularly if the lights have been exposed to moisture (and we all know how unpredictable winter weather can be). Another possibility is that the lights are drawing too much current. Overloaded circuits may trigger a voltage drop, causing the bulbs to appear dim or flicker. In addition, using an incompatible dimmer switch or an extension cord not rated for the correct voltage can also lead to these issues. To fix this, first check that all connections are tight and free of rust. Clean any corrosion off metal contacts using a gentle abrasive and electrical contact cleaner. Test the bulbs with a multimeter set to measure voltage while the lights are on. If any section shows significantly lower voltage than the rest, you may need to replace the extension cord or inspect the power source. Sometimes simply repositioning the string away from heat sources (like a nearby heater or even harsh sunlight on a metal roof) can help stabilize the electrical supply and stop the flickering.
Recognizing Issues Caused by Loose or Damaged Bulbs
Loose or partially damaged bulbs are a surprisingly common cause of malfunctioning Christmas lights. When a bulb isn't properly seated in its socket, it may make intermittent contact, leading to flickering or complete failure. In some cases, the bulb's base might be cracked or the filament inside broken, which means that even if it sits snugly in the socket, it won't light up reliably. The solution here is straightforward-inspect each bulb visually. Gently wiggle the bulb; if it doesn't feel secure, remove and reinsert it firmly. Replace any bulbs that appear fractured, discolored, or otherwise damaged. It is important to maintain bulbs of the exact type and voltage as recommended by the manufacturer to preserve the integrity of the entire string. Additionally, check for signs of wiring damage near the bulbs. Sometimes, the problem isn't just the bulb but the connection point itself. Periodic maintenance and careful storage during off-seasons can prevent this type of damage in the future.
Spotting Problems With Fuses in Your Light Strings
Fuses are the unsung heroes that protect your Christmas light strings from electrical surges, but when they fail, they can cause the entire string or larger sections to go dark. Most light sets include small fuses located in the male plug — the end with two prongs that goes into the outlet. Look for a small sliding panel on the plug face; slide it open with a flathead screwdriver or your thumbnail to reveal one or two small glass cylinder fuses, each about the size of a grain of rice.
Why fuses blow: Overloading a single outlet, daisy-chaining too many strings end-to-end, or running lights on a circuit that's already powering other gear are the usual culprits. Moisture sneaking into outdoor connections accelerates the problem. LED strings draw significantly less current than incandescent sets, which means blown fuses are less common — but "less common" isn't "never."
How to check and replace: Unplug the lights, slide open the fuse compartment, and gently pry out the old fuse. If the filament inside looks broken or the glass is darkened, that's your culprit — sometimes both fuses blow simultaneously, so check both. Most standard Christmas light strings use 3-amp fuses; if you've lost the spares that came with your set, any hardware store carries them. Drop the new fuse into the slot, make sure the metal end caps contact the terminals, slide the door closed, and test. Using a higher-rated fuse defeats the safety purpose and could cause overheating — always match the amperage rating.
If multiple fuses blow regularly, it might indicate a more serious issue with the wiring in the string or even an overloaded circuit. In such instances, consulting with a professional electrician might be the best step forward.
Essential Tools and Materials for Fixing Christmas Lights
Before diving into the repair process, it's important to gather all necessary tools and materials. Having the right equipment on hand not only makes the job easier but also ensures that repairs are performed safely. In this section, we'll discuss the essential items you'll need, ranging from replacement bulbs to specialized electrical testers.
Gathering Replacement Bulbs of the Correct Type and Voltage
When it comes to replacing burnt-out or damaged bulbs, it's critical to use bulbs that match the original specifications exactly. Christmas light strings are usually designed with specific bulb types and voltage ratings that work in series. If you use a bulb of a different type or voltage, the entire string may not function correctly. Check the packaging of your lights or look up the manufacturer's specifications online to be sure you're purchasing the correct replacement bulbs. It is also wise to buy spare bulbs in bulk, so you're prepared for any future mishaps. Bulbs made with durable materials tend to have longer life spans and resist the issues of corrosion and heat damage better than more efficient alternatives. Not only will your display look better, but you'll also save money in the long run by reducing the frequency of replacements.
If you are using pro grade LED light strings that are single molded, your bulbs are likely not removable. No need to worry, just grab some repair pods and an LED Keeper Pro to help get your light string back in working order.
Utilizing a Christmas Light Tester for Efficient Troubleshooting
A Christmas light tester (like the LED Keeper Pro for LED light strings) is a specialized tool that can help you quickly diagnose problems along your light string. These testers work by checking for continuity-they effectively tell you if the current is passing through each section of the string. When you suspect that a section of your lights isn't working, simply clip the tester onto the string, and it will indicate whether the bulbs are receiving power. This saves considerable time compared to manually checking each bulb one at a time. Testers are also useful for quickly diagnosing issues with wiring or blown fuses without having to disassemble the plug assembly. While these devices are relatively inexpensive, their impact on reducing troubleshooting time and stress can be significant, making them essential for anyone serious about maintaining a flawless holiday display.
Employing a Multimeter for Electrical Checks
A multimeter is an indispensable tool for anyone working with electronics, including Christmas lights. It allows you to measure voltage, current, and resistance, giving you a clear picture of the electrical health of your light string. When troubleshooting, you can use the multimeter to verify that power is flowing through your outlet, plug, and light string. It's also useful to check replacement fuses and bulbs for proper function before installing them. While using a multimeter might seem daunting at first, there are plenty of user-friendly tutorials available that can help you understand the basics, making it a valuable addition to your seasonal toolkit. With accurate readings, you can pinpoint exactly where the fault lies and avoid unnecessary replacements or repairs. This tool not only helps in holiday decorating but comes in handy for other minor electrical tasks around the house.
Having Small Pliers and Wire Strippers on Hand
Small pliers and wire strippers might not be the flashiest tools in your repair kit, but they are incredibly important when dealing with damaged wiring. Over time, the wires in your light strings can wear down or get nicked, especially during storage. Pliers help you grip and secure small wires, while wire strippers allow you to remove insulation without damaging the conductive core. This ensures that any spliced connections are solid and reliable. Investing in a quality set of these tools will help you make neat repairs that look professional and last longer. They also allow you to handle stubborn electrical connections that standard household tools just can't manage. Whether you're repairing damaged cords or splicing in a new section of light string, these tools are a must-have.
Using Electrical Tape for Safe Repairs
Electrical tape is essential for insulating and protecting repaired sections of wire. After splicing or reconnecting wires, applying electrical tape ensures that the connection remains secure and that no stray currents result in short circuits or further damage. High-quality electrical tape can withstand significant heat and moisture, which is critical for outdoor displays that might be exposed to unpredictable weather. Wrap tape carefully around the repaired area to smooth out any rough edges and provide an extra layer of safety. This not only helps in prolonging the life of your Christmas light string but also minimizes the risk of electrical hazards. As you work on your festive display, always remember that safety comes first; applying tape properly is one of the simplest ways to avoid future complications.
- Pro Tip: Create a small repair kit by storing all these essentials together; having them ready at hand makes troubleshooting a breeze.
Step-by-Step Process for Repairing Christmas Light Strings
Now that you're well-equipped, it's time to get into the nitty-gritty of repairing your Christmas light string. Following a systematic, step-by-step process ensures you don't miss any critical details and that your work is both safe and effective. Each step in this guide is designed to be clear and straightforward, with plenty of tips along the way to keep your holiday cheer intact.
Safely Unplugging Lights Before Starting Any Repairs
Before embarking on any repair work, it's absolutely essential to unplug your light string from the power source. This simple but critical step prevents any risk of electrical shock and ensures that you can work safely without accidentally short-circuiting any components. Even if you're an experienced decorator, handling electricity always demands caution. Once unplugged, you may also want to switch off the circuit breaker or remove the fuse from the plug if it feels necessary. Taking a few extra moments to ensure complete safety can save you from a potential mishap that could ruin not just your repair process but also your holiday plans. Always make sure that your hands are dry and that you're working on a non-conductive surface to avoid accidents.
Visually Inspecting the Light String for Obvious Damage
After ensuring your safety by disconnecting the power, conduct a thorough visual inspection of the entire light string. Lay out the lights in a well-lit area and carefully examine each bulb, wire, and plug. Look for signs of physical damage such as frayed wires, cracked bulbs, or burnt-in components that might have resulted from previous electrical issues or exposure to moisture. It's also important to check for corrosion on metal parts, especially if your lights have been stored in a humid or damp environment. Document any areas that look suspicious, and if necessary, mark them with a small piece of tape to remind you of sections that need extra attention. This initial visual scan not only helps you get a sense of the overall condition of your lights but also prevents you from missing minor issues that can escalate if left untreated.
Systematically Checking Each Bulb in a Non-Working Section
If you've identified that only a part of your light string isn't functioning, the next step is to systematically go through each bulb in that section. Start at one end and methodically test each bulb by gently pressing it to see if it wiggles loose, and then using a light tester or a multimeter to check for continuity. Even if a bulb appears to be in place, faulty internal wiring could prevent it from lighting up. Replace bulbs that appear burnt out or fail the continuity test. This process can be time-consuming, but it's essential for isolating the exact portion of the string where the fault lies. In many cases, this systematic approach can reveal that the problem is as simple as one or two burnt-out bulbs disrupting the entire circuit, rather than a complete wiring failure.
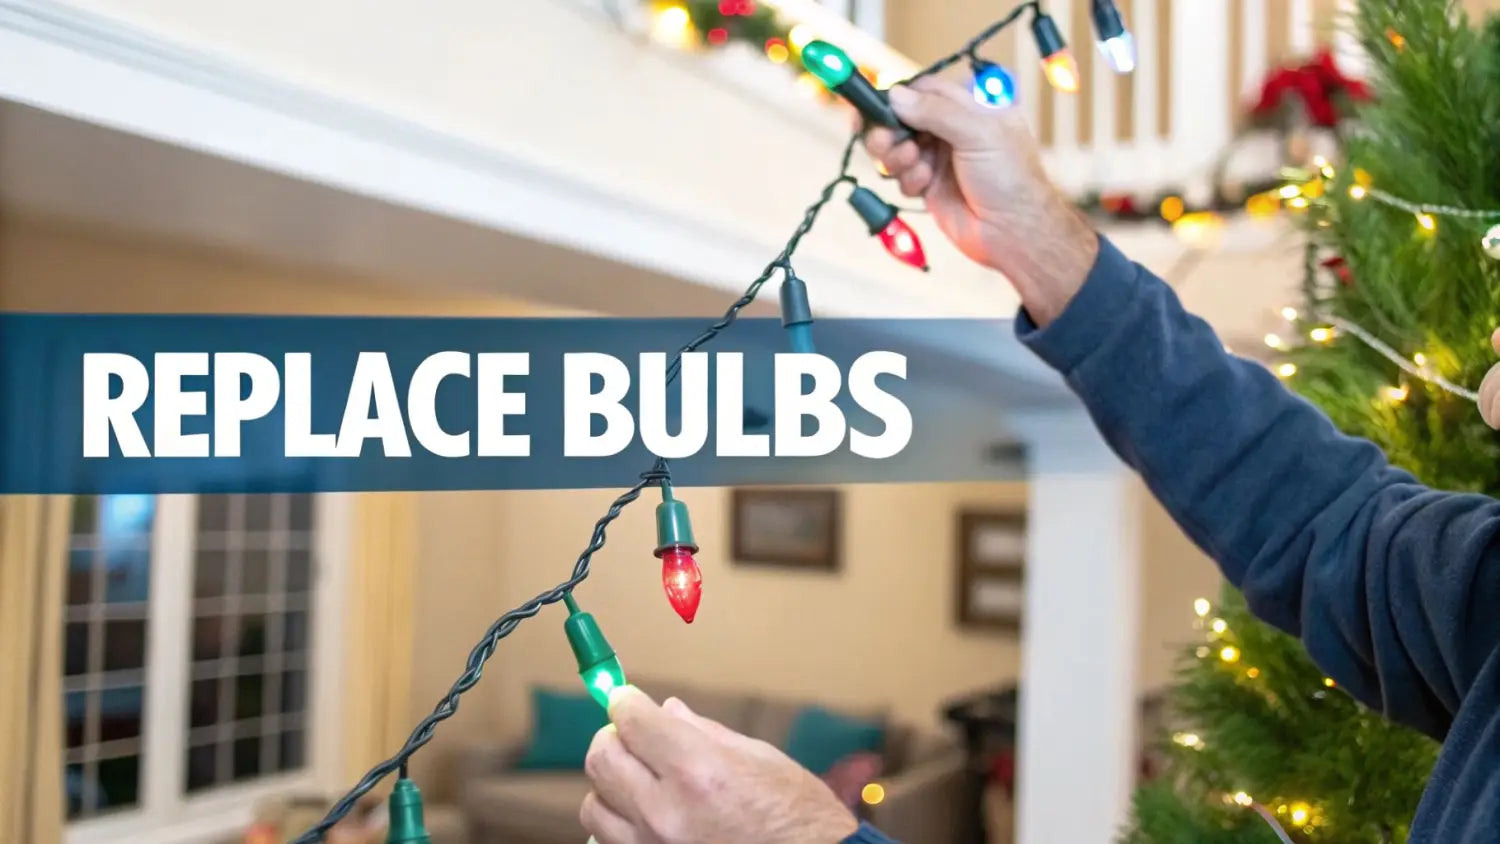
Replacing Burnt-Out or Broken Bulbs Correctly
Once you've identified which bulbs are no longer functioning, it's time to replace them. It's important to make sure you have replacement bulbs that exactly match the specifications of the originals. Insert the new bulb firmly into the socket, ensuring that it sits snugly and makes proper contact with the electrical components. Avoid forcing a bulb into place, as this can damage both the bulb and the socket. Sometimes, a bulb may seem like it's working fine until it's slightly loose and eventually causes intermittent failures. Proper installation during replacement is key. Additionally, confirm that each bulb is of the correct voltage and wattage; even a minor mismatch could lead to inconsistent performance or further electrical problems down the line.
Testing and Replacing Faulty Fuses in the Plug
A crucial but sometimes overlooked step is to check the fuses in the plug. These are designed to blow if there's too much current flowing through the string, protecting the entire assembly from damage. Remove the fuse from the plug and inspect it for any signs of burning or breakage. Use a multimeter to verify its continuity, and if the fuse is blown, replace it with one that has the same rating. Fuses are inexpensive but critical components; always ensure that you insert the correct type, as using the wrong capacity can either lead to additional fuse failures or insufficient protection. Once replaced, reassemble the plug and conduct a final test by plugging the lights back in (while standing safely away) to confirm that the fuse is functioning correctly and no other issues remain.
- Pro Tip: Keep spare fuses on hand during the holiday season. They can be lifesavers when you're in the middle of setting up your entire decoration display!
Techniques for Fixing Different Types of Christmas Light Failures
Different electrical and physical issues require specific repair techniques, and understanding these can help you tackle even the most stubborn failures in your Christmas light strings. In this section, we break down various problems and offer targeted solutions to ensure that every bulb on your string shines as intended. From issues like malfunctioning shunts in incandescent bulbs to loose connections in plugs, we cover it all.
Addressing Issues With Shunts in Incandescent Lights
Incandescent Christmas lights rely on tiny shunts to maintain electrical continuity. A shunt is a small component that allows the circuit to bypass a burnt-out bulb. However, sometimes these shunts can fail or become corroded, causing the entire string or sections of it to go dark. To diagnose this issue, you'll first need to inspect the individual bulbs for signs of discoloration, damage, or hidden corrosion near the base. If a shunt has failed, replacing the entire bulb is usually the easiest and most effective solution. While it might be tempting to try and repair the shunt itself, the delicate nature of these components makes them nearly impossible to fix at home. Instead, remove the faulty bulb and replace it with one that matches the original specifications, ensuring that the new bulb contains an intact shunt designed for its particular voltage and amperage.
Fixing Loose Connections Within Sockets or Plugs
Loose connections are a common cause of intermittent lighting issues. Over time, repeated plugging and unplugging, exposure to the elements, or even minor physical jolts can result in sockets and plugs becoming loose or worn. To address these issues, remove the problematic bulb from its socket and use a pair of small pliers to gently adjust the socket contacts, ensuring they are snug enough to hold the bulb securely. Similarly, examine the plug assembly where the light string connects to the power source. If the plug feels loose, you may need to open it up to check for damaged internal connections or worn wire insulation. Tightening screws and re-securing the wires properly can often restore a solid, uninterrupted connection. Additionally, using a bit of high-quality electrical tape around the base of the plug can help secure any loose wires, reducing movement that might cause future issues.
Repairing or Replacing Damaged Wires Safely
Damaged or frayed wires are not only a common cause of light failures but also represent a potential safety hazard. When you notice that the wiring along your Christmas light string appears worn or lightly cut, it's important to address the issue immediately. Begin by disconnecting the power and examining the damaged segment. Use wire strippers to remove any compromised insulation around the affected area. If the damage is minor, you might be able to splice the wires back together using a combination of soldering and heat-shrink tubing for added safety. For more severe damage, it's advisable to replace the entire section of wiring to ensure that the structural integrity and safety of the string are maintained. Always work in a well-ventilated area and carefully test the repaired section with a multimeter before reassembling the full string. This proactive measure prevents future electrical issues and maintains the overall longevity of your decorations.
Troubleshooting Pre-Lit Artificial Christmas Tree Lights
Pre-lit artificial Christmas trees have become increasingly popular, but issues with their integrated wiring and bulb strings can be particularly tricky. Often, these systems are designed with intricate circuits that manage the lighting automatically. When a section of lights on your tree goes dark, start by checking the power module and ensuring it's securely connected. Many trees have a designated area where you can access troubleshooting instructions specific to that model, so consult your user manual for guidance. In many cases, the problem may simply be a burnt-out bulb or a loose connector, but sometimes the issue calls for replacing an entire string. If you suspect a fault in the wiring due to age or manufacture defects, it might be necessary to contact the manufacturer for a replacement part. With these troubleshooting techniques, you can restore your tree's sparkle without having to resort to a completely new set of lights.
Using a Voltage Pulse Tool for Stubborn Light Sections
For those particularly stubborn sections of lights that still won't respond to conventional troubleshooting, a voltage pulse tool can be a a significant upgrade. This tool works by sending a brief, controlled burst of electrical current through the string, which can sometimes "wake up" bulbs that have become temporarily unresponsive due to minor circuit issues. While not a common household tool, experienced electricians or serious DIY enthusiasts might have one on hand. Using it correctly requires careful adherence to the manufacturer's instructions and safety precautions-after all, you're dealing with controlled voltage pulses. The benefits of this approach are that it can often restore proper function without the need to replace bulbs or extensive wiring repairs. However, if the tool doesn't yield results, it's likely that a more serious underlying issue exists, and a lighter section may ultimately need to be replaced entirely. Always exercise caution when using advanced diagnostic tools by testing on a small section first.
- Reminder: Always double-check your voltage settings and ensure that any tool you use is rated appropriately for the type of light string you're repairing.
▶ Watch: HOW TO EASILY FIND BAD CHRISTMAS LIGHT BULBS using a non contact voltage tester
Table: Common Christmas Light Problems and Solutions
Below is a table summarizing common lighting problems, their causes, and the recommended fixes:
| Problem Description | Common Cause | Recommended Solution | Tools Needed |
|---|---|---|---|
| Entire string not lighting | Blown fuse, no power at the plug | Check outlet, replace fuse, verify power with multimeter | Multimeter, replacement fuse |
| Section of lights dark | Burnt-out bulb breaking circuit | Systematically replace bulbs, check continuity using tester | Light tester, spare bulbs |
| Flickering or dimming lights | Loose connections, voltage drop, corrosion | Tighten connections, clean contacts, use proper extension cord | Pliers, contact cleaner |
| Loose or damaged bulbs | Poor seating, physical damage | Reinsert bulbs firmly or replace damaged ones | Replacement bulbs |
| Faulty wiring or cable damage | Frayed, cut wires or corrosion | Splice wires with solder and heat-shrink tubing, replace sections | Wire strippers, solder, heat-shrink |
| Pre-lit tree sections not working | Faulty internal wiring or burnt-out connection | Check module, replace defective string, contact manufacturer | Multimeter, user manual |
| Unresponsive bulbs after repairs | Failed shunts in incandescent bulbs | Replace bulbs entirely to restore circuit continuity | Replacement bulbs |
Before working on the repairs, take a moment to review this table for a quick reference. It can guide you through common troubleshooting measures and ensure that you're employing the appropriate tools and techniques.
Maintaining Your Christmas Lights to Prevent Future Problems
A well-maintained set of Christmas lights not only looks spectacular but also lasts for many holiday seasons. It's essential to take proactive measures to prevent problems, such as replacing weak bulbs and proper storage, so your lights are always ready to dazzle when it's time for decoration. Regular maintenance can save you both time and money, reducing the need for emergency repairs when you're in the thick of holiday preparations.
Pre-Season Cleaning
Before you hang your lights, giving them a quick clean can enhance their brightness and longevity. Use a soft cloth to gently wipe down each bulb — over the year, lights accumulate dust and debris that dulls their luminosity. Compressed air works well for blowing dirt out of hard-to-reach spots around sockets and connections.
Preventing Blown Fuses
A few habits go a long way toward keeping your fuses intact:
- Don't exceed the rated connection limit. Most residential strings are rated for 3–5 end-to-end connections. Check the tag on your lights.
- Use weatherproof connections. Weatherproof plug gaskets keep moisture out — the single biggest cause of outdoor fuse failures.
- Spread the load. Use multiple circuits and outlets instead of running everything off a single power source.
- Protect empty sockets. On C7 and C9 stringer setups, cap any unused sockets to prevent moisture ingress.
If blown fuses and dead bulbs are a recurring headache, the strings themselves might be the issue. Commercial-grade LED strings are built with heavier wire gauges, sealed connections, and more robust construction that handles the stress of outdoor use season after season without the constant fuse drama.
Proper Methods for Taking Down and Storing Light Strings
Once the festive season is over, properly taking down your Christmas light strings is key. Begin by unplugging the lights and gently detangling the string to prevent kinks and damage. Store them on a sturdy reel or a long cardboard tube, coiling the lights loosely to avoid stress on the wires. Avoid leaving them bunched up in storage containers where they can be crushed-this may lead to corrosion or physical damage, impairing functionality for the next season. Label your storage containers clearly so that you know which set is intended for which part of your décor, helping to speed up the setup process in subsequent years. Taking these extra steps may seem like a chore at the time, but they extend the lifespan of your lights and ensure they work flawlessly when you need them most.
Checking Lights Before Storage to Catch Issues Early
Before stowing away your lights, give each set a quick test run to make sure every bulb is working. This pre-storage test can help you catch issues while it's still early in the off-season, allowing you time to perform necessary repairs. If you notice any bulbs that are unusually dim or sections that don't light up at all, repair them immediately before storing. Preventive maintenance now means you won't be scrambling during the holidays when you discover your display has a few dark spots. Use your light tester or multimeter for a thorough check, and replace any damaged components. Regular testing will help you build a habit of maintenance that can extend the useful life of even an older set of Christmas lights.
Replacing Weak or Burnt-Out Bulbs Proactively
Bolster the longevity of your light strings by replacing weak or burnt-out bulbs proactively before they result in larger issues. Constantly working with mismatched, degraded bulbs can not only dim your display but also cause voltage drops which may impact the performance of the entire string. Keep a stock of compatible replacement bulbs so that whenever you spot a weak link in the chain, you can immediately swap it out. Maintaining a uniform brightness is key to achieving that dazzling holiday look, and ensuring every bulb is operating at peak performance reduces the risk of strain on the remaining lights. As a best practice, schedule an annual inspection of your sets as part of your post-holiday clean-up routine.
Storing Lights in a Way to Avoid Tangling and Damage
Proper storage is perhaps the most critical step in preserving your Christmas light strings. Invest in organizational tools like a dedicated reel or even a portable organizer bag designed for delicate electronics. Ensure that the storage environment is dry, cool, and dark to minimize the risk of corrosion. Tangling is a common issue that can cause physical damage, so carefully tease apart the strands and store them in a layout that reduces knots. Consider using separate compartments for different sets if you have multiple types or sizes of lights. This careful approach not only keeps your lights in better condition but also makes the setup process next year much more hassle-free and enjoyable.
- Pro Tip: Establish a simple checklist for seasonal maintenance, including visual inspections, bulb replacements, and cleaning of contact points.
When to Consider Replacing Your Christmas Light Strings
While repair and maintenance can handle many issues, there comes a time when replacing your entire Christmas light string is the more sensible choice. If your lights have suffered extensive wiring damage, multiple bulb failures, or simply aren't performing as they once did, it might be time to invest in a new set. This decision isn't made lightly, as a good set of Christmas lights can be a cherished part of your holiday tradition. However, safety should always be your top priority, and outdated or irreparable strings can pose a significant hazard.
Recognizing Signs of Irreparable Wire Damage
The first and most obvious sign that it's time to replace your lights is when you notice significant damage to the wiring. This could be in the form of frayed cables, exposed wires, or sections of the wire that have become brittle and discolored. Such damage often indicates that the wires are no longer safe to use and may lead to short circuits or even electrical fires. If more than one section of a long string shows these symptoms, it is likely more cost-effective and safer to buy a new set rather than try to repair each damaged piece. Thoroughly inspect each segment of your string; if you determine that extensive repairs are required, it's better to replace the lights altogether.
Determining if Multiple Bulb Failures Make Repair Impractical
Another clear indicator that replacement might be the best course of action is when there are sustained or repeated failures in multiple bulbs throughout the string. When you have to replace numerous bulbs and fuses frequently, the time and effort invested in repairs exceed the cost and convenience of purchasing a new set. Additionally, older strings that have been repaired multiple times may not perform as efficiently as new ones, resulting in uneven lighting and higher energy consumption. In cases where the overall performance is compromised by these recurring failures, upgrading to a modern LED string-which tends to be more durable and energy-efficient-could be a smart choice for both quality and sustainability.
Understanding the Lifespan of Incandescent Versus LED Lights
The lifespan of your Christmas light strings is significantly influenced by the type of technology used. Incandescent lights, while traditional and charming, typically have a shorter lifespan and are more prone to issues such as bulb burnout and wiring fatigue. On the other hand, modern LED lights are built to last significantly longer, often enduring for four to five times the number of seasons as incandescent lights. This longevity, combined with lower energy consumption and better durability, might make them a more attractive option despite a higher upfront cost. Consider the long-term benefits and overall performance improvements when making your decision-often, the initial investment in LED lights pays off in the form of fewer repairs and a more reliable display every year.
Prioritizing Safety With Old or Damaged Light Sets
Ultimately, safety should be the guiding factor in deciding whether to repair or replace your Christmas light strings. Even if you're sentimental about a particular set of lights, if they have become old or show multiple signs of electrical wear, it's time to let them go. Compromised wiring, repeated fuse failures, and overall degradation of performance can pose serious risks, including potential fire hazards. Upgrading to a newer, higher quality set not only enhances the aesthetic appeal of your holiday décor but also ensures that your celebrations remain safe. Investing in a new set of lights might also provide advantages in terms of energy efficiency and ease of maintenance over the long runway of holiday decorating traditions.
-
Key Tips:
- Replace strings with significant wiring damage.
- Multiple recurrent failures may indicate replacement.
- Consider switching to LED lights for safety and efficiency.
- Safety should be your top priority when handling electrical decorations.
Conclusion
Fixing your Christmas light strings doesn't have to be a daunting task. By following a systematic step-by-step process, you can quickly diagnose and repair common issues-from replacing burnt-out bulbs and faulty fuses to addressing loose connections or damaged wiring. With the right tools and a proactive maintenance routine, you can extend the life of your light strings and ensure that your decorations shine bright during every holiday season. Moreover, knowing when it's time to invest in a new set-especially when safety is at risk-saves you from emergency repairs during the busiest time of the year. So, grab your multimeter, pliers, and electrical tape, and get ready to transform a dark string of lights into a festive masterpiece!
Frequently Asked Questions
Q: How do I know if the problem with my lights is due to a blown fuse or a wiring issue?
A: If the entire string is dark, start by checking the fuse in the plug. Use a multimeter to test for voltage. If there's no power at the plug, the fuse is likely blown; if power is present, then the wiring might be damaged. Always ensure to unplug the lights before testing.
Q: What tools should I have on hand before attempting repairs on my Christmas lights?
A: Essential tools include a multimeter, light tester, small pliers, wire strippers, and electrical tape. Having replacement bulbs and correct fuses matching the voltage and type specifications is also crucial for efficient repairs and ensuring safety during the process.
Q: Is it safe to repair Christmas lights on my own, or should I call an electrician?
A: For minor repairs like replacing bulbs, fuses, or reconnecting loose wires, you can usually handle it safely with basic tools. However, if you encounter widespread wiring damage or are unsure about handling electrical components, it's best to consult a professional electrician to avoid risk of shock or fire.
Q: What is the benefit of using LED Christmas lights over traditional incandescent ones?
A: LED lights are more energy-efficient, have a longer lifespan, and are more resistant to damage from weather and frequent use. They also produce steady, bright light without the frequent bulb failures common with incandescent strings, making them a practical upgrade for many holiday decorators.
Q: How can I prevent my Christmas light strings from failing in the future?
A: Regular maintenance is key-store your lights properly, check for loose connections and corrosion before each season, and proactively replace worn-out bulbs. Use proper storage methods to prevent tangling and ensure that all electrical components, such as fuses and wiring, are kept in good condition to avoid future failures.
Final Thoughts
Your holiday decorations deserve to shine as brightly as your festive spirit. By mastering the repair techniques discussed above, from identifying common problems to using the right tools and knowing when to replace your light strings, you can ensure a safe, spectacular display every year. Whether you're fixing a single faulty bulb or replacing extensive wiring, your DIY efforts will save money and add a personal touch to your decorations. Embrace these tips and enjoy a brilliantly lit holiday season as you spread cheer to all those who behold your dazzling display.
Where to Buy Professional Quality Light Strings, Bulbs and Christmas Light Repair Tools
We may be a little biased, but we think The Christmas Light Emporium is your top choice of decorators for our pro grade HollyBrand® LED light strings, ProCore® LED bulbs, and one of the world's largest selections of unique colors and styles of Christmas light strings and bulbs - and, of course, Christmas light string repair tools like the LED Keeper Pro!


