8 Stunning DIY Outdoor Christmas Decorations for 2025
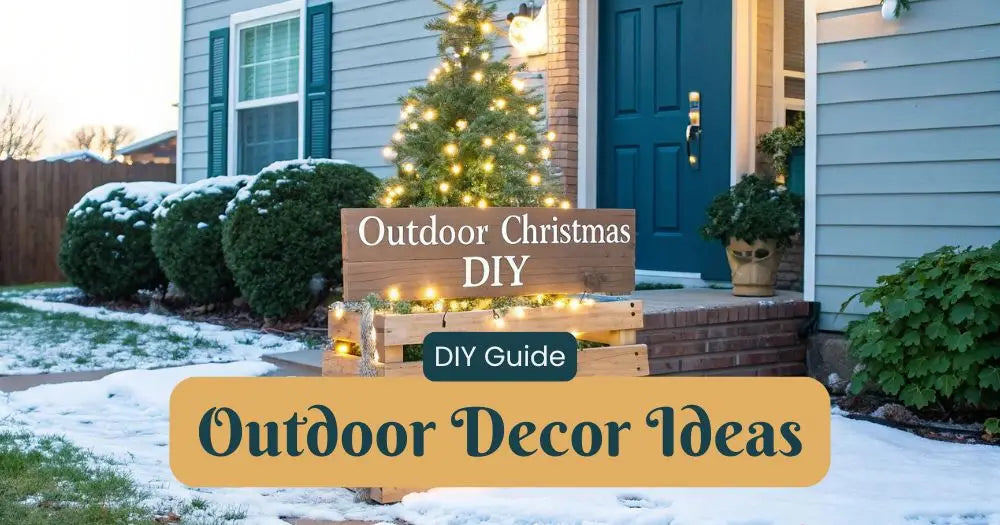
The magic of the holiday season often starts right at your curb, with twinkling lights and festive displays welcoming guests and delighting neighbors. While elaborate store-bought decorations can be stunning, they often come with a hefty price tag. This year, why not infuse your holiday decor with personal charm and creativity? This guide explores eight unique and actionable DIY outdoor Christmas decorations that will elevate your home's exterior without breaking the bank.
From rustic pallet wood trees to enchanting ice luminaries, each project is designed to be both beautiful and achievable. We'll provide you with detailed instructions, material lists, cost estimates, and professional styling tips to ensure your creations look polished and can withstand the winter elements. To truly transform your yard, consider a holistic approach to outdoor aesthetics; this blog offers a variety of guides to beautiful outdoor spaces that can complement your festive additions. Get ready to roll up your sleeves, embrace your inner artist, and craft a holiday display that is uniquely yours, blending handmade charm with a professional finish.
1. Mason Jar Lanterns
Transforming simple mason jars into glowing Christmas lanterns is one of the most versatile and charming DIY outdoor Christmas decorations you can create. This project involves filling standard glass jars with LED string lights, to produce a warm, contained glow. Their self-contained nature makes them perfect for homeowners seeking an elegant yet simple-to-execute holiday display with a rustic, homemade feel.
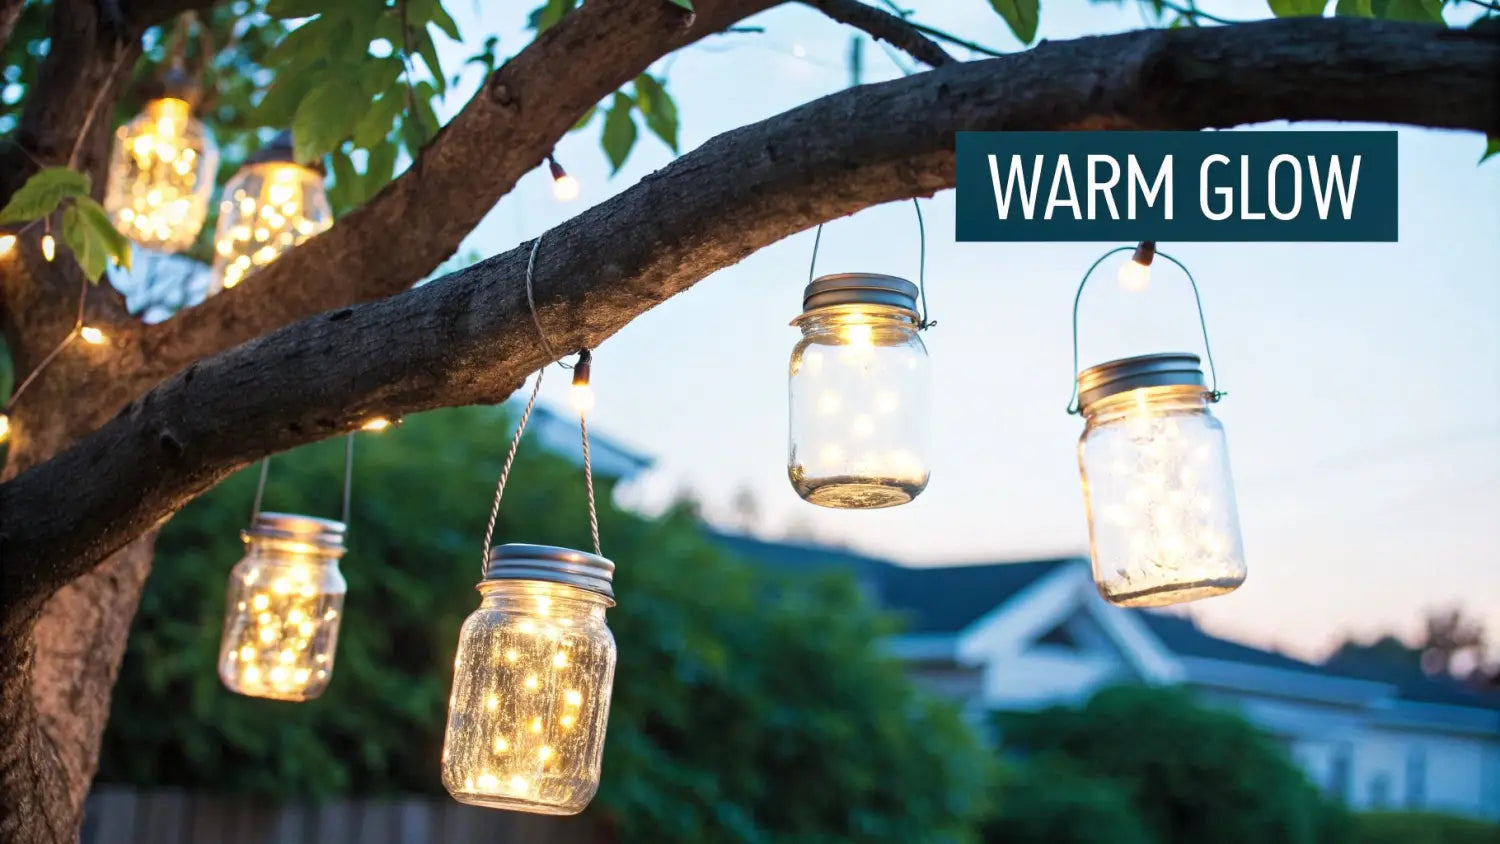
This idea’s popularity is evident across home decor platforms and even professional event planning. From Pinterest, where thousands of variations exist, to holiday specials on HGTV, mason jar lights are a festive staple. Their adaptability also makes them a favorite for winter weddings, where planners use them to line aisles or create magical centerpieces.
Implementation and Styling Tips
To ensure your lanterns withstand the elements and look their best, follow these practical steps:
- Prevent Water Buildup: If placing jars in an area exposed to rain or snow, be sure to seal the areas around holes in the. lid (where the power wires come out) using a silicon sealant.
- Secure Hanging: For a reliable hanging mechanism, wrap sturdy copper or galvanized wire tightly around the neck of the jar, just below the threads, and create a handle.
- Choose the Right Glow: Select warm white LEDs for a cozier, more traditional flame-like ambiance. Cool white can feel stark in an outdoor setting unless you are aiming for a modern, icy theme. To learn more about selecting the perfect lights, discover the best outdoor LED Christmas lights for a stunning holiday display.
2. Pallet Wood Christmas Trees
Creating rustic, eco-friendly Christmas trees from reclaimed pallet wood is a fantastic way to build statement-making DIY outdoor Christmas decorations. This project involves disassembling shipping pallets and arranging the planks in a triangular tree shape, which can then be decorated. Their sturdy, weathered nature makes them ideal for a charming farmhouse-style Christmas display that holds up beautifully against winter weather.
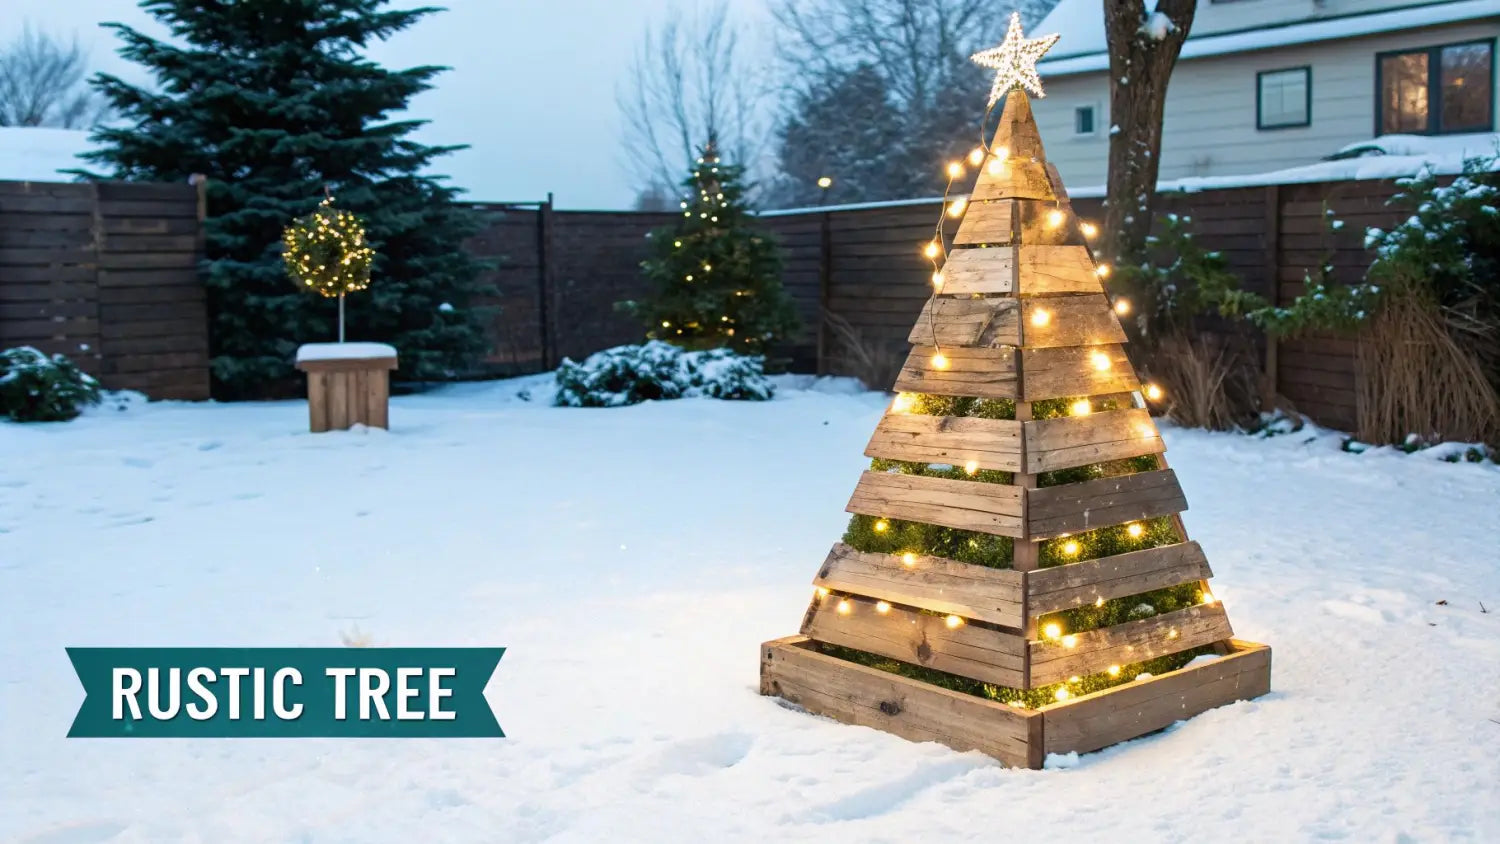
This trend has been widely embraced by the DIY community and home decor enthusiasts. Prominently featured in publications like Country Living magazine and at rural Christmas markets, these wooden trees have become a symbol of rustic holiday charm. DIY bloggers such as Ana White have even popularized free building plans, empowering thousands of homeowners to create their own versions. The farmhouse style's continued popularity ensures these trees remain a relevant and beloved decoration.
Implementation and Styling Tips
To construct durable and visually appealing pallet trees, focus on proper preparation and assembly with these tips:
- Prioritize Safety and Finish: Always sand pallet wood thoroughly to remove splinters and smooth rough edges, making it safer to handle and easier to paint or decorate.
- Prevent Rust Stains: Use galvanized screws for assembly. Standard screws will rust when exposed to rain and snow, leaving unsightly orange streaks on your finished project.
- Ensure Longevity: Before painting or decorating, apply a coat of wood preservative or an outdoor-rated sealant. This crucial step protects the wood from moisture, rot, and insects, extending the life of your decoration for years.
- Create a Stable Base: For larger trees, build a sturdy base using triangular support brackets or by attaching the tree to a solid wooden block. This prevents it from tipping over in strong winds.
- Incorporate Lighting Safely: Pre-drill holes for string lights before weaving them through the planks. This prevents the wood from splitting and creates a cleaner, more professional look.
3. Ice Luminaries and Frozen Ornaments
Harnessing winter's natural freezing temperatures in northern climates, this DIY outdoor Christmas decoration involves creating stunning ice luminaries and ornaments. By freezing water in balloons, buckets, or molds, you can produce ephemeral yet magical decorations that glow beautifully when lit. This method allows for endless creativity, incorporating natural elements like cranberries, pine sprigs, or citrus slices for added visual interest and a touch of organic elegance.
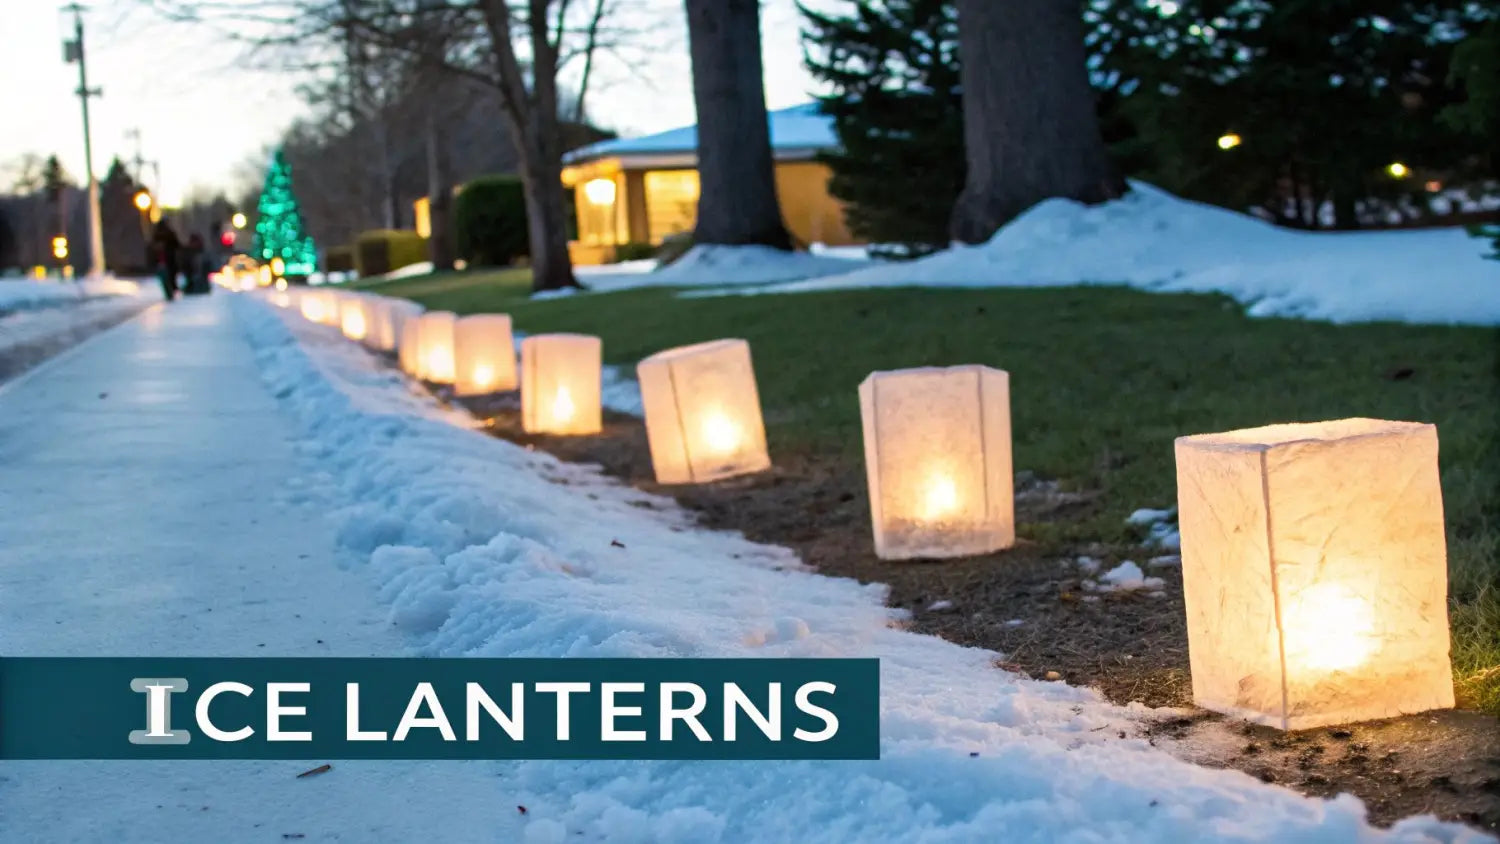
This idea is deeply rooted in Scandinavian winter traditions, where ice lanterns are a festive staple. Its popularity has grown through lifestyle bloggers in northern climates and large-scale winter festivals in places like Canada. Many communities in Minnesota and Wisconsin even host annual ice luminary events, lining entire streets with these glowing creations to celebrate the season.
Implementation and Styling Tips
To create clear, safe, and beautiful ice decorations that last, consider these practical tips:
- Achieve Crystal-Clear Ice: Use distilled water instead of tap water. Distilled water has fewer impurities and dissolved minerals, resulting in a more transparent, glass-like finish that catches light beautifully.
- Prevent Refreezing Puddles: As luminaries melt, they can create icy patches on walkways. Place them on a bed of rock salt or create small drainage channels in the snow to direct meltwater away from foot traffic areas.
- Strengthen Your Molds: When using balloons to create spherical luminaries, double-layer the balloons (place one inside another before filling with water). This significantly reduces the chance of a premature burst during the freezing process.
- Experiment with Texture: For an interesting, crackled appearance, sprinkle a small amount of coarse salt onto the surface of the ice as it freezes. The salt creates unique patterns and textures within the ice.
4. Outdoor Christmas Wreaths from Natural Materials
Creating oversized outdoor Christmas wreaths from natural, locally sourced materials is a time-honored tradition that brings rustic elegance to any holiday display. This project involves crafting large-scale wreaths using foraged elements like evergreen boughs, grapevine, pinecones, and berries. These sustainable and highly personal DIY outdoor Christmas decorations are perfectly sized for fences, barn doors, or even as grand ground displays, offering an authentic, earth-friendly alternative to mass-produced decor.
This classic decorating idea is championed by lifestyle experts like Martha Stewart, who annually features tutorials on natural wreath making. Its historical significance is highlighted at living museums like Colonial Williamsburg, where traditional crafting techniques are demonstrated. Furthermore, garden clubs and Master Gardener programs across the country host popular workshops each December, reinforcing its status as a beloved community activity.
Implementation and Styling Tips
To craft a beautiful and durable natural wreath that lasts through the season, consider these practical tips:
- Create a Sturdy Base: For a flexible yet strong frame, soak a grapevine wreath base in warm water for about 30 minutes. This makes it much easier to shape and weave branches into.
- Ensure Freshness: Harvest evergreen branches like fir, cedar, or pine in the cool of the early morning. This helps the needles retain maximum moisture and stay fresh longer. Mist your finished wreath with water every few days to maintain its vibrant look.
- Secure Elements for Durability: Use green floral wire instead of hot glue or ribbon to attach heavier elements like pinecone clusters or fruit. The wire provides a much stronger, weather-resistant hold that won't fail in cold or damp conditions.
- Attract Winter Wildlife: Incorporate natural elements that are safe for birds to eat, such as rosehips, crabapples, or unsalted cranberry and popcorn strands. This turns your decoration into a functional and beautiful winter bird feeder. The same principles apply if you want to create stunning DIY Christmas garlands from natural materials.
- Protect Your Surfaces: Fresh evergreen sap can stain wood, paint, and siding. To prevent this, attach a layer of burlap or felt to the back of the wreath where it will make contact with your door or wall.
5. Lighted Chicken Wire Christmas Shapes
Creating three-dimensional Christmas figures from chicken wire and lights is a high-impact DIY outdoor Christmas decoration that produces professional-looking results. This project involves sculpting hexagonal wire mesh into festive shapes like stars, trees, or reindeer, and then wrapping them with LED string lights. The result is a series of glowing, ethereal sculptures that provide an impressive lighting display, highly visible from a distance.
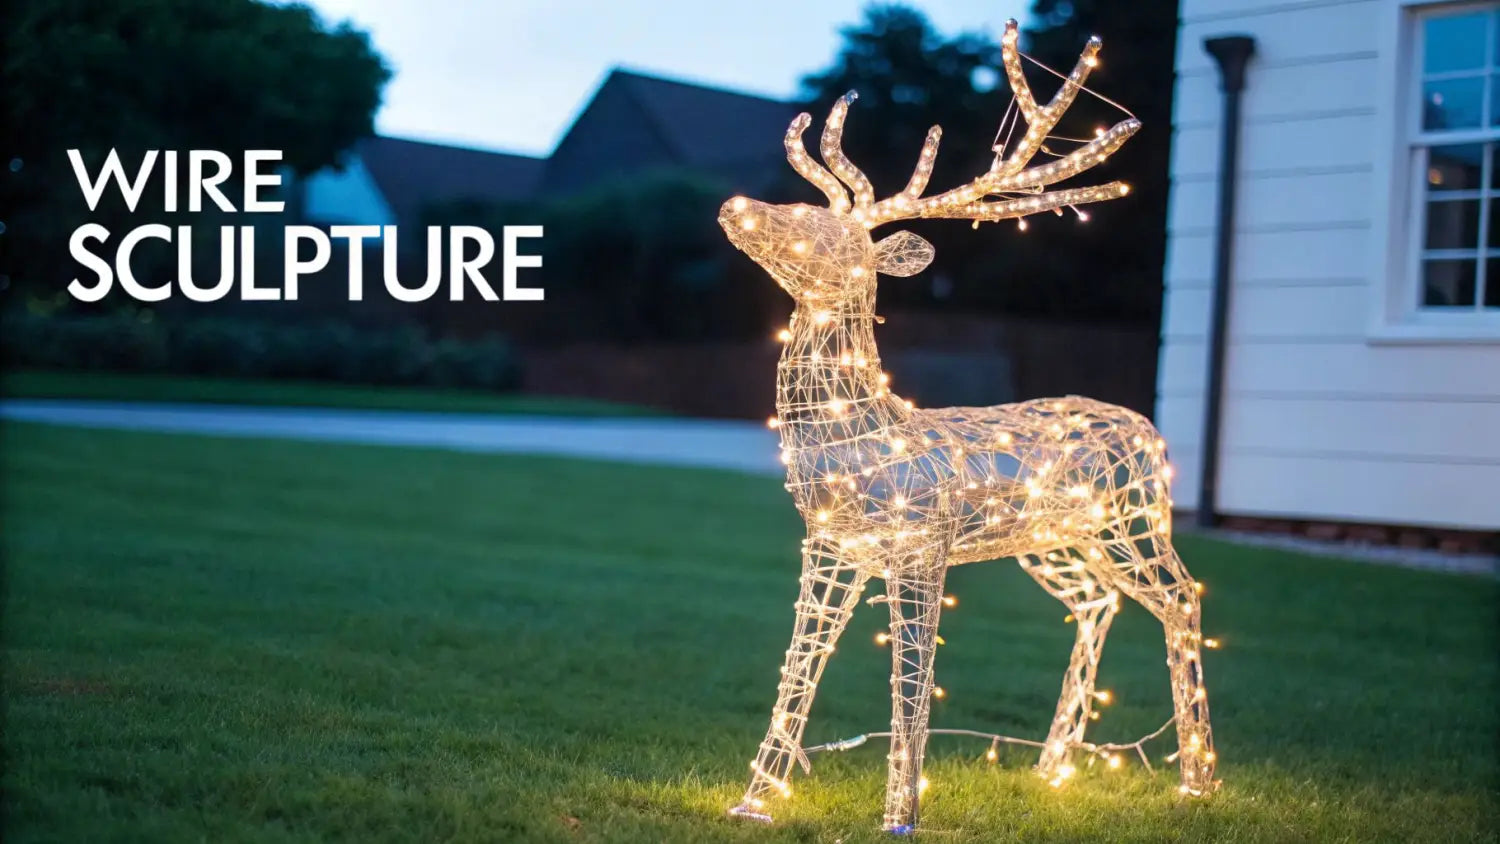
This technique has been popularized by professional holiday lighting installers and featured in decorating guides from publications like Better Homes and Gardens. The affordability and creative potential have also made it a favorite among YouTube DIY creators, with tutorials collectively gaining millions of views. Its scalability makes it suitable for both home yards and larger municipal or commercial holiday displays.
Implementation and Styling Tips
To craft these stunning light sculptures safely and effectively, keep these practical tips in mind:
- Prioritize Safety: Always wear heavy-duty work gloves and safety glasses when handling and cutting chicken wire. The cut edges are extremely sharp and can easily cause injury.
- Start with Simple Forms: If you are new to this method, begin with simple geometric shapes like stars, cones (for trees), or cubes (for presents). Master the technique of bending and securing the wire before attempting more complex figures like reindeer.
- Secure Lights Tightly: Use UV-resistant zip ties to attach the light strands to the wire frame at regular intervals. This prevents the lights from sagging or shifting in wind and snow, ensuring an even, polished look.
- Plan Your Power Source: Before you start building, decide where your sculpture will be placed and how you will power it. This will help you position the plug end of the light string correctly and avoid running extension cords across high-traffic areas.
For a visual guide on building a 3D sphere, this tutorial provides excellent step-by-step instructions:
6. Wooden Christmas Yard Signs and Cutouts
Creating custom wooden yard signs is a fantastic way to produce large-scale, personalized DIY outdoor Christmas decorations that make a bold statement. This project involves cutting shapes or messages from plywood, painting them with festive designs, and sealing them against the elements. These decorations can range from simple signs pointing to the North Pole to elaborate, life-sized cutouts of reindeer, snowmen, or nativity scenes, offering a truly unique touch to your holiday display.
This classic DIY approach is a cornerstone of the home crafting community, with platforms like Pinterest featuring tens of thousands of examples. You'll also see these charming creations featured in publications like Southern Living and sold at local craft fairs, where their handmade quality is highly valued. The popularity of wooden yard art stems from its ability to reflect a family's personality and holiday traditions in a very tangible way.
Implementation and Styling Tips
To ensure your wooden cutouts are durable and visually impressive, consider these practical tips:
- Choose the Right Material: Start with exterior-grade or marine-grade plywood. This type of wood is manufactured with waterproof glue, making it far more resistant to moisture, warping, and delaminating in winter weather.
- Prime Before Painting: Always apply a quality exterior primer to all surfaces, including the edges, before you start painting. This seals the wood and ensures your paint colors appear vibrant and adhere properly.
- Weatherproof with Sealant: After your paint is completely dry, apply at least two coats of a clear, UV-resistant polyurethane or spar urethane. This topcoat is crucial for protecting the paint from fading and the wood from moisture damage.
- Create Templates First: Before cutting into your plywood, design and test your shapes on large pieces of cardboard. This allows you to perfect the design and proportions without wasting expensive materials.
- Ensure Stable Installation: Secure your cutouts to sturdy wooden stakes or metal fence posts. For larger pieces, consider using a weighted A-frame base to prevent them from tipping over in strong winds. To discover more ways to enhance your display, you can learn how to decorate your yard for the holidays with yard art.
7. Solar-Powered Christmas Light Displays
Harnessing the power of the sun for your holiday glow is a smart and sustainable approach to creating DIY outdoor Christmas decorations. This method involves using solar-powered LED light systems, which gather energy during the day via a small solar panel and automatically illuminate your yard at night. This eco-friendly solution eliminates electricity costs and messy extension cords, making it ideal for homeowners seeking a festive, off-grid display that is both beautiful and cost-effective.
This trend is championed by environmental advocates and off-grid living enthusiasts, and its practical benefits have made it a mainstream choice. Publications like Popular Mechanics have featured solar lighting in sustainable holiday guides, while environmental blogs often showcase stunning large-scale installations powered entirely by the sun. It's particularly useful in rural or large properties where access to outdoor outlets is limited.
Implementation and Styling Tips
To maximize the performance and visual impact of your solar-powered lights, consider these practical tips:
- Optimize Panel Placement: Position the solar panel where it will receive at least six to eight hours of direct, unobstructed sunlight. In the Northern Hemisphere, a south-facing location is optimal for maximum sun exposure during winter months.
- Keep Panels Clean: Regularly wipe the solar panel with a soft cloth to remove dust, debris, or snow. A clean panel absorbs sunlight far more efficiently, ensuring a brighter and longer-lasting display each night.
- Choose Efficient Lights: Select LED light sets specifically designed for solar systems. These are engineered for low power consumption, which allows them to shine brightly for hours even on a limited charge.
- Plan for Cloudy Days: For more reliable performance, look for solar kits with a higher-capacity battery. A robust battery can store enough power to keep your lights on through one or two overcast days.
- Conserve Power Strategically: Some solar light sets come with multiple modes. Using a "blinking" or "fading" setting consumes less energy than a steady "on" mode, extending the nightly runtime. For more DIY lighting ideas, you can review this patio lighting DIY guide.
8. Burlap and Twine Rustic Decorations
Embracing a rustic, farmhouse aesthetic, this style of DIY outdoor Christmas decorations uses natural materials like burlap and twine to create a warm and inviting atmosphere. The core idea is to craft items such as oversized bows, garlands, and planter wraps from these earthy, textured fabrics. Their inherent simplicity and durability make them an excellent choice for anyone wanting to achieve a charming, country-chic holiday display that beautifully complements the natural winter landscape.
This trend has been powerfully propelled by farmhouse decorating influencers like Joanna Gaines and is a recurring feature in publications such as Country Living and Better Homes & Gardens. The natural, understated appeal of burlap and twine makes them a go-to for designers creating everything from cozy front porch displays to rustic winter wedding decor, proving their versatility beyond just residential holiday setups.
Implementation and Styling Tips
To create durable and visually appealing burlap decorations, focus on these practical techniques:
- Prevent Fraying: Burlap’s loose weave is prone to unraveling. To maintain clean edges on bows and ribbons, apply a thin coat of clear nail polish or a fray-check sealant along any cut lines and allow it to dry completely.
- Quick and Secure Assembly: A hot glue gun is your best tool for this material. It bonds quickly and strongly to the coarse fibers, making it ideal for layering burlap, attaching embellishments like pinecones, or securing seams on wrapped planters.
- Add Colorful Contrast: Enhance the neutral tones of burlap by weaving in natural elements. Intertwine it with fresh evergreen garlands, sprigs of holly, or faux red berries to create a vibrant, festive look that pops against the fabric.
- Pre-Shrink the Fabric: If your decorations will be highly exposed to moisture, consider pre-shrinking the burlap by washing it on a gentle cycle and machine drying it on low heat before crafting. This prevents your creations from warping out of shape mid-season. For more budget-friendly ideas, you can explore other affordable Christmas decoration ideas that pair well with this rustic style.
- Proper Off-Season Storage: To prevent mold or mildew from developing, ensure your burlap decorations are completely dry before storing them. Place them in a breathable container, like a fabric bag or a cardboard box, in a dry location such as a loft or closet.
DIY Outdoor Christmas Decorations Comparison Table
| Decoration Type | Implementation Complexity 🔄 | Resource Requirements ⚡ | Expected Outcomes 📊 | Ideal Use Cases 💡 | Key Advantages ⭐ |
|---|---|---|---|---|---|
| Mason Jar Lanterns | Low - simple assembly, no wiring | Low - mason jars, LED lights | Warm, ambient outdoor lighting with festive glow | Portable outdoor décor, safe lighting alternatives | Inexpensive, reusable, child & pet safe |
| Pallet Wood Christmas Trees | High - requires woodworking skills, tools | Moderate - pallet wood, screws, stains | Durable rustic outdoor Christmas trees | Farmhouse style displays, customizable decorations | Eco-friendly, cost-effective, long-lasting |
| Ice Luminaries and Frozen Ornaments | Low - requires freezing, minimal crafting | Very low - water, balloons/containers | Stunning ephemeral ice decorations with soft glow | Cold climates, short-term magical outdoor effects | Cost-free, natural, biodegradable |
| Outdoor Christmas Wreaths from Natural Materials | Moderate - requires foraging and assembly | Low - natural materials from local environment | Large, unique, natural wreaths blending with nature | Sustainable outdoor decorating, natural themes | Free materials, unique, biodegradable |
| Lighted Chicken Wire Christmas Shapes | High - shaped wire frames, light wrapping | Moderate - chicken wire, LED strings | Dramatic 3D lighted sculptures visible from far away | Professional displays, business/municipal use | Impressive visuals, durable, collapsible storage |
| Wooden Christmas Yard Signs and Cutouts | Moderate to high - woodworking and painting | Moderate - plywood, paint, sealants | Personalized, artistic yard signs | Custom family décor, artistic outdoor displays | Highly customizable, reusable, potential heirlooms |
| Solar-Powered Christmas Light Displays | Moderate - solar setup and light installation | Moderate to high - solar panels, LED lights | Sustainable, energy-free outdoor lighting | Off-grid areas, eco-conscious decorators | Energy cost savings, automatic operation |
| Burlap and Twine Rustic Decorations | Low - basic crafting skills required | Low - burlap, twine, natural materials | Rustic, weather-resistant farmhouse-style décor | Casual outdoor decorating, natural texture emphasis | Inexpensive, easy, biodegradable |
Lighting Up the Season with Your Personal Touch
Creating your own outdoor Christmas decorations transforms your home's exterior from a simple display into a personal statement of holiday cheer. As we've explored, the journey from raw materials to a finished product is where the real magic happens. It’s in these moments, whether you're arranging fairy lights in a mason jar or shaping chicken wire into a glowing reindeer, that lasting memories are made. The true value of these projects isn't just in the potential cost savings; it's in the pride and joy of crafting a display that is uniquely yours.
Synthesizing Your Creative Vision
The most impactful holiday displays often come from a thoughtful combination of elements. Think about how the rustic, earthy texture of a Burlap and Twine Rustic Garland can complement the smooth, clean lines of Pallet Wood Christmas Trees. Or how the ethereal, temporary magic of Ice Luminaries can be anchored by the sturdy, year-after-year presence of Wooden Christmas Yard Signs. The key is to create a layered and dynamic scene.
Consider these strategic takeaways as you finalize your plans:
- Mix Materials and Textures: Combine wood, glass, metal, and natural elements like pinecones and greenery. This variety adds visual depth and interest, making your display feel more professional and curated.
- Vary Heights and Scales: Position taller items like pallet trees or yard cutouts in the background, with smaller decorations like mason jar lanterns or ice luminaries closer to walkways. This creates a sense of scale and draws the eye through your entire yard.
- Master Your Lighting: The right illumination is crucial. Use a mix of focused light (like in chicken wire shapes) and ambient glows (from lanterns and luminaries). For larger displays, integrating Solar-Powered Christmas Light Displays can be a smart, energy-efficient choice that reduces extension cord clutter.
From Inspiration to Actionable Holiday Crafting
The transition from idea to execution is the most exciting part. As you bring your personal touch to outdoor decorations, remember that the spirit of DIY and assembly can extend to many other holiday preparations.
Ultimately, crafting your DIY outdoor Christmas decorations is an investment in your home's holiday atmosphere. You are not just decorating; you are building a tradition. Each project, from a simple frozen ornament to an elaborate lighted sculpture, contributes to a festive welcome that will delight your family, neighbors, and guests all season long. So, choose the projects that spark your imagination, gather your tools, and get ready to light up your neighborhood with creativity and personal flair.
Ready to bring your brilliant DIY ideas to life? Ensure your creations shine bright and last all season with professional-grade lighting. For durable, high-quality LED lights, clips, and all the essential accessories for your DIY outdoor Christmas decorations, visit The Christmas Light Emporium. Find everything you need to make your display safe, stunning, and spectacular at The Christmas Light Emporium.


