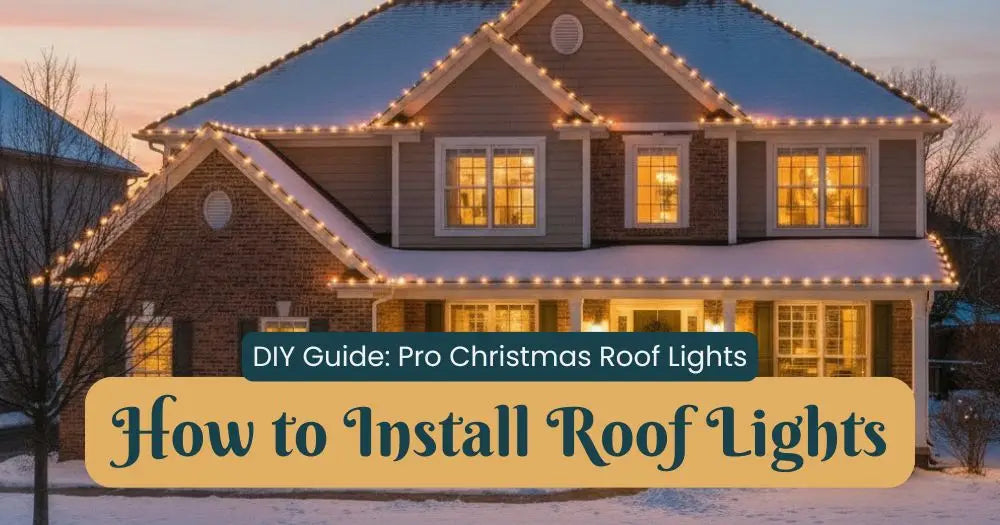
How to Install Christmas Roof Lights Like a Pro With Cut‑to‑Length Socket Wire
Want that crisp, photo‑ready C9 roofline without a tangle of cords or bulbs pointing every which way? This step‑by‑step guide shows you how to build a pro‑level C9 roofline using cut‑to‑length socket wire, SPT‑1 jumpers, and slide‑on vampire plugs. You’ll measure once, assemble most of it on the ground, snap on the right clips, and hand off on/off duty to a timer. We’ll keep it simple, safe, and tidy—and point you to the exact parts that make installs faster and cleaner.
Introduction to Installing Christmas Lights
Installing Christmas lights is an absolutely magical tradition that brings jaw-dropping holiday spirit to your home and neighborhood—trust me, your neighbors will be talking! For homeowners, the process of planning and installing lights on your roof and house can be both thrilling and incredibly rewarding—especially when you see your display light up for the first time and think "wow, I actually did that!" Before you dive in, take a close look at your roof and the areas you want to transform into something spectacular. Think about the style you're after—whether it's a classic warm white glow that screams elegance or a colorful, festive display that steals the show from three blocks away! Here's the kicker: inspect your lights for any signs of damage or wear to keep your installation safe and prevent fire hazards—because nobody wants their holiday magic turning into a holiday nightmare. With a little preparation and attention to detail, you'll create a display that's not only absolutely stunning but also safe and reliable for the entire season—the kind that makes people slow down just to admire your handiwork!
What you’ll need (the short list)
|
Item |
Why it matters |
Where to get it |
|---|---|---|
|
ProCore C9 LED bulbs |
Bold, efficient, and durable; perfect for rooflines |
|
|
C9 socket line or bulk socket spool |
Gives you precise spacing and cut‑to‑fit runs |
|
|
SPT‑1 wire (18 AWG) |
Clean, custom jumpers from outlet to start points |
|
|
Slide‑on vampire plugs |
Fast male/female and inline taps for perfect routing |
|
|
Roofline clips |
Keep bulbs aligned and damage‑free; some clips are designed to hook onto gutters or the roof edge for secure attachment without the need for screws, preventing damage to shingles or gutters |
|
|
Weather protection |
Keep moisture out of plugs and empty sockets |
|
|
Timer/photocell |
Hands‑off control and energy savings |
Choosing the Right Lighting Options
Let's be honest: selecting the perfect Christmas lights for your home is absolutely key to creating a jaw-dropping display that'll steal the show during the holiday season! LED lights? They're a total game-changer for homeowners everywhere because—here's the kicker—they're incredibly energy-efficient, ridiculously long-lasting, and stay cool to the touch, which means you're dramatically reducing those pesky fire hazards. Fear not, my friend, because rope lights offer amazing flexibility and can be effortlessly wrapped around trees, gutters, or along your roofline for that custom look that'll have your neighbors talking! When you're choosing your lights and bulbs, you've got to consider the areas you want to highlight and the overall wow-factor you're after—trust me on this one. And here's the thing: always, always follow the manufacturer's instructions for installation and maintenance to keep your display safe and absolutely shining bright all season long!
Step 1: Measure and map like a pro
- Walk the façade with a tape and notebook. Record linear feet of each roofline segment, plus peaks/ridge lines you plan to outline.
- Mark where power is available. Locate the nearest power outlet before planning your run, and note outlet locations and the cleanest path to your first bulb.
- Sketch the layout. Draw each segment with its length, mark corners, and decide start/end points. Carefully position bulbs at corners and peaks to create visual balance. Decide which direction bulbs should face at corners so they look symmetric. A balanced layout helps achieve a complete and polished look.
- Decide spacing. Most rooflines use 12” C9 spacing for that classic, upscale look. Bulk socket spools also come in 15”–24”; choose the look you want and stick with it.
- Color plan. Choose a single color (warm white is timeless) or a pattern. If you’ll change colors later, order 10–20% extra bulbs for swaps and spares.
Pay attention to details during the planning stage to ensure a smooth installation.
Pro Tip: If you’re outlining windows too, note those perimeters now so your color and spacing match the roof.
Step 2: Build clean power runs with SPT‑1 and vampire plugs
Custom jumpers eliminate messy extension cords across gutters and downspouts.
- Cut SPT‑1 to the exact length from your outlet to the start of your socket line, and ensure you properly connect the SPT‑1 wire to the socket line.
- Add a male slide‑on plug at the outlet end. Observe polarity: the ribbed conductor is neutral.
- If you need to add power in the middle of a run (for a wreath, tree, or a second roof segment), use an inline female pass‑through plug where power should drop. It’s as simple as piercing the insulation and snapping the housing closed.
- Terminate the far end with a termination cap. Label each jumper with painter’s tape so reinstall next season is instant.
- Keep jumpers off sharp edges and form drip loops so water falls away from connections.
Pro Tip: For synchronized operation and to avoid voltage issues, power multiple LED lines from the same outlet.
Why it works: SPT‑1 jumpers make the installation look professional and intentional - and reduce voltage drop headaches you get from daisy‑chaining long cords.
Step 3: Prep the C9 socket line on the ground
- Dry‑fit bulbs into the socket line and lay the run in front of the house to estimate/verify corner positions and any peaks.
- Snap clips onto the socket line before you climb. For shingles and gutters, select purpose‑built clips that keep bulbs upright and evenly spaced. Some clips are designed to tuck under shingles, but alternatives are available to avoid roof damage—choose the appropriate clip for your roof type. See our Christmas light clips collection.
- At corners, sight your layout so bulbs meet neatly with equal spacing on each side. If a socket lands in a bad spot, remove that bulb and cap the empty socket with Socket Stuffers to keep moisture out.
- If you’re using bulk spool, cut sections to your sketch and pre‑attach male/female plugs where each run starts and ends. Label each section by location.
Pro Tip: Install bulbs and clips onto the socket line from the ground. It’s much easier to do on the ground than from a ladder!
Step 4: Install safely and keep it straight
- When putting up lights, work left‑to‑right (or right‑to‑left) consistently. Start at a highly visible corner, then set a midpoint for a “sight line” to keep the direction uniform.
- Secure every socket or every other socket depending on wind exposure. The goal is a laser‑straight row with bulbs pointing the same direction.
- Avoid nails and staples. Purpose‑built clips protect shingles, fascia, and wiring—and they’re faster.
- Maintain three points of contact on ladders and don’t overreach. OSHA requires at least one hand grasping the ladder and promotes three‑point contact for climbing safety (OSHA 1910.23 guidance). To prevent falling, consider using fall protection gear such as a full body harness, vertical lifeline, or permanent roof anchors.
Don’t stress over minor adjustments or small imperfections—most people won’t notice them, and a stress-free installation is the goal.
Tips for Hanging Christmas Lights Without a Ladder
If climbing ladders isn't your thing—and hey, who can blame you?—you can still hang Christmas lights safely and create an absolutely show-stopping display! Light-hanging poles are game-changers—they let you attach clips to your lights and extend your reach to gutters, eaves, and all those tricky high spots without ever leaving solid ground. For larger or more jaw-dropping displays, renting a bucket lift can make installing and hanging lights on your roof a total breeze—and way safer too! If you'd rather leave it to the pros (smart move!), hiring a professional ensures your lights are installed rock-solid and look absolutely fantastic. No matter which method you choose, always use the right clips and attachments, and here's the kicker: safety comes first when hanging Christmas lights—because the best holiday display is one where everyone stays safe and sound!
Step 5: Weatherproof and automate
- Use in‑use covers and outdoor‑rated cords. Plug exterior decorations into GFCI‑protected circuits; if your outlet isn’t GFCI, use a portable outdoor GFCI adapter. ESFI’s outdoor holiday guidance reinforces GFCI use, outdoor‑rated gear, and secure fastening to protect cords from wind damage (ESFI tips).
- Gasket every plug junction that lives outdoors. Our clear covers add a simple moisture barrier that helps prevent nuisance trips and corrosion.
- Cap unused sockets. Empty C7/C9 sockets collect water; cap them to help limit moisture ingress.
- Add a time. The Department of Energy notes that timers and photosensors prevent lights from running when they’re not needed and are especially effective outdoors; a photocell timer can turn lights on at dusk while a manual timer shuts them off at a set hour (DOE Lighting Controls).
- Choose LEDs for efficiency and safety. DOE’s consumer guidance notes LEDs use at least 75% less energy and run cooler than incandescents—perfect for long holiday runtimes and reducing the risk of fire hazard, since incandescent lights can overheat (DOE LED Lighting).
Creative Ideas for Your Roof Lighting
Ready to turn your roof into the most jaw-dropping Christmas display on the block? Your roof isn't just protection—it's your ultimate canvas for holiday magic! For that timeless, elegant vibe that never goes out of style, outline those roof edges and peaks with a single color of lights to create crisp, clean lines that'll make your neighbors stop and stare. But hey, want to really steal the show this season? Go bold, my friend! Mix and match colors like a pro or create killer patterns that show off your roof's unique features—think dramatic angles, that gorgeous center peak, all those architectural details that make your house special. You can even take it to the next level with themed displays that'll have people talking all season long—imagine a winter wonderland that looks straight out of a movie, candy cane stripes that scream festive fun, or a sparkling gingerbread house that brings childhood dreams to life! Whatever brilliant idea strikes your fancy, let that creativity absolutely shine and have a blast making your roof the show stopping centerpiece of your entire holiday display!
Quick ordering checklist (copy/paste)
- C9 bulbs: total roofline feet ÷ socket spacing + 10–20% spares.
- Socket line: length per segment (cut to fit) + short adders for corners.
- SPT‑1 wire roll for jumpers and tap drops.
- Slide‑on male, female, and inline pass‑through plugs.
- Roofline clips matched to shingles, gutters, ridge line, or metal fascia.
- Weatherproof gaskets and socket caps.
- Outdoor timer/photocell.
Troubleshooting (fast fixes)
- A bulb doesn’t light? Check the bulb seating and the socket’s bottom contact pin. Our help site explains simple socket adjustments for C7/C9 bases.
- Tripping in rain? Elevate connections, add gaskets, and cap unused sockets. Keep connections out of mulch and puddles.
- A line looks wavy? Add clips at the midpoint between existing clip points, then sight along the line at night and nudge angles.
- Colors don’t meet neatly at a corner? Pull one socket from the corner and cap it so both legs land symmetrically.
- Too few outlets? Use SPT‑1 jumpers and inline taps to create tidy branches from a single GFCI, staying within safe load limits. If you’re unsure about load, see our guide on planning how many lights to run on one circuit.
Example build (one‑story, 68’ roofline)
- 68 C9 sockets at 12" spacing → order 75–100 bulbs to allow for spares and future pattern changes.
- One 68’ socket line cut to fit, plus two short pieces for small peaks.
- One 30’ SPT‑1 jumper from garage GFCI to the first socket line; plus an inline tap for a wreath.
- 100+ roofline clips for every‑socket attachment and perfect angles.
- Socket Stuffers (caps/covers) for any removed bulbs at corners and for extra sockets on cut segments.
- One outdoor photocell timer set dusk‑to‑11 pm.
Taking Down and Storing Your Lights
Think the holiday magic ends when the last gift is unwrapped? Think again! When the holiday season winds down, taking down your Christmas lights like a pro is just as crucial as that jaw-dropping installation you pulled off—and here's the kicker: doing it right sets you up for next year's most spectacular display yet. Here's how the pros do it: carefully remove those lights from your roof and house (no yanking or tugging on those precious bulbs or wires, folks—that's a rookie mistake that'll cost you!), then wrap your lights around a storage reel or sturdy cardboard like you're creating a masterpiece for next season. Want to make next year's installation a piece of cake? Store those beauties in a cool, dry spot—your garage or attic is perfect—and label each set so you can easily grab exactly what you need when it's time to create holiday magic again. Trust us, taking that little extra care now means next year's installation will be absolutely effortless, and your lights will keep delivering that show-stopping glow for many seasons to come—because who doesn't want to be the most talked-about house on the block year after year?
Finish with an easy bundle (optional)
Want the shopping list pre‑built? Our Roofline Bundle includes bulbs, socket wire, clips, SPT‑1, plugs, and a timer—everything for up to 250’ of roofline. Add weather gaskets and socket caps to keep things rock‑solid in wet weather.
Safety mini‑checklist before you plug in
- Inspect cords, plugs, and sockets for damage.
- Confirm GFCI protection and outdoor ratings on all exterior gear (per ESFI guidance).
- Keep ladders on level ground; extend above the landing and maintain three‑point contact (OSHA).
- Use timers/photosensors to reduce runtime and save energy (DOE).
Many families begin installing lights in November to share the Christmas spirit and create a sense of wonder in their community. A well-designed display not only brightens your home but also brings neighbors together, enhancing the festive atmosphere for everyone.
That’s it! With cut‑to‑length socket wire, SPT‑1 jumpers, and a few installer‑grade accessories, you’ll get a straighter, safer, better‑looking roofline in less time—one that makes your house pop from the curb and on camera all season long.
🎄 Happy Decorating!


