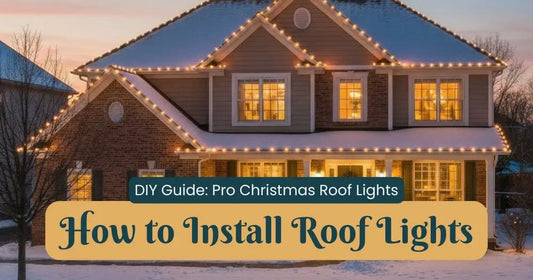
Christmas Light Wiring Diagram for Safer Holidays
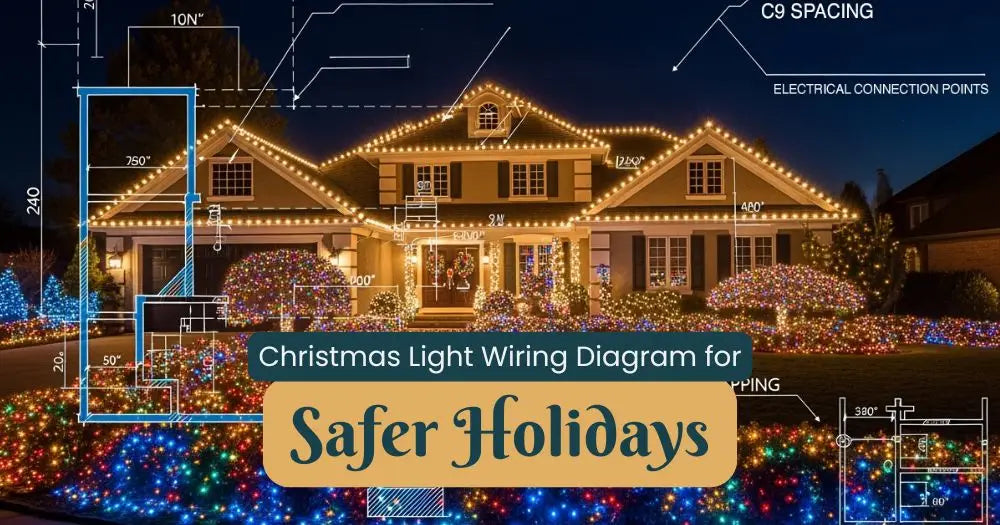
A Christmas light wiring diagram is your single most important tool for planning a safe, stunning, and reliable holiday display. Think of it as a blueprint for your lights. It maps out where your power sources are, how many lights each circuit can handle, and how everything connects without putting your home’s electrical system at risk.
A simple sketch is your best defense against tripped breakers and, more importantly, it seriously reduces fire risks.
Why a Wiring Diagram Is Your Most Important Tool
Before you even think about untangling a single strand of lights, the most important work you'll do is with a simple pen and paper. We can't stress this enough: a well-thought-out wiring diagram is what separates a joyful, twinkling masterpiece from a season of frustration and electrical headaches. It's the step that takes your project from pure guesswork to a deliberate, safe, and efficient plan.
You wouldn’t build a house without a blueprint, right? The same exact logic applies to your holiday lighting. Without a diagram, it's all too easy to create a massive "daisy chain" of lights that overloads a single circuit. That leads to constant trips to the breaker box or, far worse, a dangerous electrical hazard.
Moving Beyond Basic Warnings
Anyone can tell you to "be careful," but that generic advice doesn't really help you avoid real-world risks. The true value of a wiring diagram is that it forces you to look at the numbers. It makes you calculate your electrical load, respect the maximum connection limits provided by your light string or bulb manufacturer, and strategically map out how you'll distribute power across multiple circuits.
This planning is vital for both safety and actually getting the job done right. A proper diagram ensures:
- Circuit Protection: You can see at a glance that no single outlet is burdened with more lights than its circuit can handle—typically 12 or 16 amps (80% max load on a 15 or 20 amp circuit, respectively).
- Reliable Performance: Your lights will shine brightly all season long, without the annoying flickering or failures that happen when they're starved for power.
- Efficient Setup and Takedown: When you know exactly where each string connects, both installation and removal become faster and much more organized.
A wiring diagram isn’t about artistic talent; it’s about electrical logic. Its only goal is to give you a clear visual map of your entire display, from the power outlet to the very last bulb.
The Real-World Impact of Poor Planning
Ever since Christmas lights became popular in the early 20th century, improper electrical practices have been a sad, recurring theme in holiday accidents. In the United States alone, holiday decorations are linked to about 860 residential fires annually, with another 210 fires connected directly to Christmas trees.
Many of these incidents stem from unsafe wiring and a failure to follow manufacturer guidelines—precisely the problems a good wiring diagram is designed to help you avoid.
Ultimately, taking 30 minutes to sketch out a plan is an investment in your own peace of mind. It’s the foundational step that protects your home, your family, and the magic of your holiday display, ensuring everything runs smoothly from the first flicker to the final farewell.
Calculating Your Home's Electrical Capacity
Before you hang a single light, we need to talk about power. We know, it's not the fun part, but even the most spectacular Christmas light wiring diagram is useless if it overloads your home's circuits. This is where a successful display truly begins—not with the lights, but with a quick trip to your breaker box.
First things first, walk around your house and locate all the outdoor electrical outlets you plan to use. Most modern homes have at least one or two, usually near the front door or back patio. You absolutely want to see GFCI (Ground Fault Circuit Interrupter) outlets here. They’re the ones with the little "test" and "reset" buttons, and they're a non-negotiable safety feature designed to cut power instantly if they detect moisture and/or various other types of power irregularities.
Once you know where you’ll be plugging in, it's time to figure out exactly how much juice you have to work with.
Identifying Your Circuit's Capacity
Head over to your home's main electrical panel, or breaker box. Each one of those little switches controls a different circuit, and each has a number stamped on its handle—typically 15 or 20. That number is the amperage (amps), which tells you the maximum current that circuit can safely handle before it trips.
Most standard outdoor outlets are on a 15-amp circuit. Some newer homes or dedicated outlets in a garage might be on a beefier 20-amp circuit. The next piece of the puzzle is figuring out what else is on that circuit. It’s pretty common for an outdoor plug to share power with garage lights, a workshop, or even a basement rec room or sometimes all of the outdoor outlets are on the same circuit.
An easy way to find out is to flip the breaker off and see what else in the house loses power. This is a critical step because every lamp, tool, or TV on that circuit is already using up some of your available power, leaving less for your beautiful light display.
Key Takeaway: The golden rule for safe decorating is to never load any circuit beyond 80% of its maximum capacity - including EVERYTHING running on the circuit, not just your Christmas lights. This buffer is your safety net, preventing overheating and annoying tripped breakers.
Calculating Your Total Power Draw
Now that you know your circuit's max amperage capacity, you can calculate how many lights it can actually support. This comes down to a simple formula that connects three key terms:
- Watts (W): This measures how much power a light string consumes. You'll find it listed right on the product tag.
- Volts (V): In the United States, standard household voltage is 120V. Think of this as the electrical pressure.
- Amps (A): This is the current, the number you found on your circuit breaker.
The formula is a classic: Watts ÷ Volts = Amps.
Let's do the math for a standard 15-amp circuit, remembering our 80% safety rule.
- Max Amps: 15A x 0.80 = 12 Amps
- Max Watts: 12A x 120V = 1,440 Watts
So, for that one 15-amp circuit, you have a power budget of 1,440 watts. Don't exceed it.
Real-World Example: Incandescent vs. LED
Let's see how this works in practice. Imagine you want to hang 10 strings of those classic, nostalgic C9 incandescent bulbs. If you are using strings of 25 bulbs with each bulb pulling 7 watts, each string pulls 175 watts.
- Total Wattage: 10 strings x 175 watts/string = 1,750 watts
Whoops. That 1,750-watt load is way over the 1,440-watt safe limit of our 15-amp circuit. Plug that in, and you'll be making a trip to the breaker box to reset a tripped beaker. To make that display work, you'd have to find a way to split the lights across two completely separate circuits.
This is where the magic of modern LEDs becomes incredibly obvious. If you want a deep dive, you can explore the differences between LED and incandescent Christmas lights in our comprehensive guide.
Now, let's run that same scenario with energy-sipping LED C9 bulbs. A comparable string of ProCore 25 bulb C9 LEDs at .84 watts per bulb might only use 21 watts.
- Total Wattage: 10 strings x 210 watts/string = 210 watts
At just 210 watts, this display is a tiny fraction of the circuit's capacity. You could power this entire setup and still have over 1200 watts to spare for other decorations. This simple math proves why checking your home's capacity is the most important first step in planning a safe and brilliant holiday display.
Choosing the Right Lights and Extension Cords
The hardware you choose for your holiday display is every bit as important as the design itself. Your lights and extension cords are the physical foundation of your Christmas light wiring diagram, and they have a direct impact on safety, power draw, and the final look of your home. Believe me, not all products are created equal, and knowing the difference is the secret to a successful and safe installation.
Your first big decision is between old-school incandescent bulbs and modern LEDs. Incandescents have that classic, warm glow many of us grew up with, but they’re incredibly power-hungry and get surprisingly hot. That high wattage doesn’t just put a strain on your circuits; it severely limits how many strings you can safely plug into each other.
LEDs, on the other hand, have completely changed the game for holiday decorators. They use a tiny fraction of the energy, stay cool to the touch, and let you create much longer, safer runs of lights. This efficiency isn't just about saving a few bucks—it's a core safety feature that makes mapping out your wiring diagram a whole lot easier.
Decoding the UL Tag and Its Limits
Every string of lights sold in the U.S. should have a small but critical tag near the plug, usually from Underwriters Laboratories (UL). This tag is your single most trusted source of information. Learning to read it isn't optional; it's a must-do for safe planning.
This little tag gives you two pieces of data that are vital for your wiring diagram:
- Total Wattage: The power consumption for that specific light string.
- Maximum Connections: The absolute highest number of identical strings you can safely connect end-to-end.
Ignoring this limit is one of the most common—and dangerous—mistakes people make. Chaining too many incandescent strings together, for example, can literally melt the wire insulation and create a serious fire hazard. Your wiring diagram has to respect these limits, showing exactly where one run ends and a new, separately powered run begins.
The manufacturer's maximum connection limit isn't a suggestion—it's a safety specification calculated based on the wire's ability to handle the electrical load. Always trust the tag over any rule of thumb.
The Great Debate: Incandescent vs. LED Lights
The choice between light types goes way beyond just looks; it's a practical decision that directly affects your power bill and wiring plan. With over 150 million sets of lights sold in the U.S. each year, the collective impact of this choice is massive. A home using traditional incandescent lights can burn through 500 kWh during the holiday season. By swapping to LEDs and following a smart Christmas light wiring diagram, that usage can drop to just 100 kWh, which means real savings.
To make the choice crystal clear, let's put them head-to-head.
Incandescent vs. LED Christmas Lights Comparison
This table breaks down the key differences between traditional incandescent and modern LED Christmas lights, helping you decide which is right for your display.
| Feature | Incandescent Lights | LED Lights |
|---|---|---|
| Energy Usage | High (e.g., 5-7 watts per bulb) | Very Low (e.g., 0.5-1 watt per bulb) |
| Heat Output | Hot to the touch | Cool to the touch |
| Max Connections | Low (Often 3-5 strings) | High (Often 20-40+ strings) |
| Durability | Fragile glass bulbs | Our ProCore bulbs use an indestructible polycarbonate lens while our LED strings use UV infused acrylics and polycarbonate for durability |
| Lifespan | ~1,500-3,000 hours | up to 100,000+ hours |
| Cost | Lower initial purchase price | Higher initial price, but lower long-term cost |
As you can see, the practical advantages of LEDs are pretty hard to ignore. If you're looking for more ways to save on your energy bill this holiday season, making the switch is one of the biggest moves you can make.
Selecting the Right Extension Cord
Think of your extension cords as the arteries of your display, carrying power from your outlets to your lights. Using the wrong cord isn't just a bad idea; it's a major safety risk. For any outdoor display, you absolutely must use cords clearly marked "Outdoor Rated" or "Suitable for Outdoor Use." These are built with tough, weather-resistant insulation that can handle moisture, sunlight, and freezing temperatures.
Beyond that, the most important spec is the cord’s wire gauge. It's indicated by an "AWG" (American Wire Gauge) number, and it’s a little counterintuitive: the lower the number, the thicker the wire and the more power it can safely carry.
- 16-Gauge Cords: Good for light-duty, short runs (under 25 feet) with a small load, like a few strings of LED lights.
- 18-Gauge Cords: the most common for bulk spools of wire that can be purchased to make your own extension cords for a professional custom look.
- 14-Gauge Cords: Your all-around workhorse. Great for medium-duty jobs and longer runs up to 50 feet.
- 12-Gauge Cords: This is the heavy-duty option. It's what you want for very long runs (100+ feet) or when you're powering multiple high-wattage items from one cord.
It helps to think of it like a garden hose. A skinny little hose can't push much water over a long distance, but a thick fire hose can. Your 12-gauge cord is the fire hose.
Here’s a real-world example. Say you need to power decorations on a detached garage 75 feet from the nearest outlet. A 16-gauge cord would suffer a serious voltage drop over that distance, making your lights look dim and potentially overheating the cord. A 14-gauge might get the job done, but a 12-gauge cord is the safest and most effective choice. It ensures your lights get full, consistent power without creating a risk. Always match the cord's capacity to the total wattage you calculated for your diagram.
Drafting Your Christmas Light Wiring Diagram
Alright, you've figured out your power capacity and picked out the perfect lights. Now for the fun part—drafting your Christmas light wiring diagram. This is where your grand vision starts to take shape on paper. Don't think of this as some overly technical schematic; it's more like a strategic map that'll guide your entire installation.
The goal here is pure practicality. Your sketch doesn't need to be a masterpiece. A simple, hand-drawn outline of your house and yard will do the trick just fine. Grab a pencil and paper (or a tablet, if you prefer) and start sketching the key features you plan to light up. Make sure you hit all the major architectural elements.
- Rooflines and Gables: Mark the peaks and edges you want to outline.
- Windows and Doors: Draw the frames you plan to trace with lights.
- Bushes and Trees: Sketch in the prominent landscape features you want to feature.
- Railings and Fences: Note any porch railings, deck perimeters, or fence lines in your design.
With the basic layout down, it's time to mark your power sources. Use a distinct symbol—maybe a star or a lightning bolt—to show where every outdoor GFCI outlet is located. These are the starting points for your entire electrical network.
Mapping the Light Runs
Now, let's start connecting the dots. Using your property sketch as a guide, begin drawing the actual paths your light strings and extension cords will take. It helps to use different line styles or colors to represent different types of lights. For instance, you could use a squiggly line for the C9 bulbs along the roof and a dotted line for the mini lights you'll wrap around the porch columns.
As you draw each run, think logically about where the power is coming from. Every line you draw should start at one of your marked outlet symbols. This is the visual gut-check that helps you avoid overloading a single circuit. If you have lights on the roof, bushes in the front yard, and a display on a detached garage, your diagram should clearly show them connecting to different outlets whenever possible to spread the load.
A great wiring diagram does more than just plan for installation; it also sets you up for a painless takedown in January. By mapping everything out, you create a logical system that makes unplugging, sorting, and storing your lights incredibly efficient.
A Practical Example for a Two-Story Home
Let's walk through a common scenario: a two-story house with an attached garage. The goal is to light the main roofline, the garage roofline, two big windows on the second floor, and the bushes lining the front foundation. You've identified two available outdoor GFCI outlets—one near the front door and another on the side of the garage.
A smart Christmas light wiring diagram for this setup would split the job in two:
- Circuit 1 (Front Door Outlet): One extension cord runs from this outlet up to the main roofline to power the C9 strings. A second, shorter cord runs from that same outlet to power the mini lights on the foundation bushes.
- Circuit 2 (Garage Outlet): A separate extension cord runs from the garage outlet to power the lights on the garage roofline. From that same outlet, another cord connects to the lights framing the two second-story windows.
This approach neatly splits the total electrical load across two independent circuits, which drastically reduces the risk of tripping a breaker. On the diagram, you'd use different symbols to show the light string types and the paths of the extension cords, making the whole plan easy to follow. To get a better handle on the different lights you might use, check out our guide on everything you need to know about Christmas light strings.
Including Key Details in Your Diagram
To make your diagram truly your best friend during installation, layer in some important notes and symbols. This little bit of extra detail will save you some major headaches later.
-
Symbol Key: Create a small legend in the corner. Something simple like:
--- = 16-Gauge Cord,~~~ = C9 LEDs,... = Mini Lights. - Wattage Totals: Next to each outlet symbol, write down the total calculated wattage for all the lights plugged into that circuit. This is your final safety check against that 1,440-watt limit for a standard 15-amp circuit.
- Cord Lengths: Estimate and jot down how long your extension cords need to be for each run. This instantly turns your diagram into a shopping list, ensuring you buy the right lengths and gauges from the start.
By taking a few minutes to draft this simple but detailed plan, you're setting yourself up for a smooth and successful installation. Your diagram becomes your guide, your safety checklist, and your inventory sheet all rolled into one. It’s the single best thing you can do to ensure your holiday display is both stunning and safe.
Pro Installation Techniques and Safety Protocols
Once you have your Christmas light wiring diagram mapped out, it's time to shift your thinking from just hanging lights to installing them like a seasoned pro. This is where the real magic happens. We're talking about moving beyond the basics to focus on smart power management, long-term durability, and, most importantly, rock-solid safety. These are the techniques that take a display from "nice" to truly breathtaking—and keep it that way all season long.
The number one concept the pros use for any display bigger than a few bushes is zoning. It's simple, really. Think of your property in separate electrical sections. You might have a "roofline zone" for the icicles and C9s on your gables and another "yard zone" for all your ground stakes and lit-up deer. Your wiring diagram should clearly show each zone pulling power from a different circuit. This prevents overloads and makes finding a problem a thousand times easier.
Upgrading Your Installation Hardware
If you're going to do zoning right and build a display that can handle whatever winter throws at it, you'll need to graduate from the typical consumer-grade gear. It's time to invest in hardware that's built for better performance and safety.
- Heavy-Duty Power Stakes: Ditch those flimsy plastic stakes. You want robust, power stakes that have multiple, individually covered outlets. These become a secure, central power hub for your lawn zone.
- Specialized Splitters and Taps: This is a pro's secret weapon. Installers use what are often called "vampire plugs" or "zip plugs." These let you tap into power exactly where you need it by creating custom-length extension cords from bulk wire. No more coiling up 20 feet of extra cord. The result is a much cleaner, more professional look.
- Programmable Outdoor Timers: A heavy-duty, outdoor-rated timer is non-negotiable. It's not just for convenience; it's a huge safety feature. Setting your lights to turn off automatically in the dead of night reduces wear and tear and shrinks the window for any potential electrical problems.
When you start using these tools, you're no longer just plugging things in. You're actually engineering your power grid for peak efficiency and safety.
A truly polished holiday display is defined by what you don't see. The best installations have virtually no extension cords snaking across the lawn or dangling from the roof. This clean look is all about careful planning, custom cords, and smart power placement.
Essential Outdoor Safety Protocols
You can have the most beautiful design in the neighborhood, but it means nothing if it's not safe. Your wiring diagram is the blueprint, but the physical installation needs to follow strict safety rules, especially when you're up against Mother Nature. The same core principles are used by event organizers handling professional lighting display techniques and safety for massive public events.
Your first line of defense against moisture is the GFCI outlet. Every single outdoor decoration needs to be plugged into a Ground Fault Circuit Interrupter. This little device is your best friend. It's designed to shut off the power in a split second if it detects a fault, like electricity trying to go somewhere it shouldn't—like through a puddle. Consider them mandatory.
Next up, you have to weatherproof every single connection. That spot where one extension cord plugs into another? That's a weak point. Rain, snow, and even morning dew can get in there. Use specialized weatherproof connection boxes that snap shut right around the plugs, shielding them completely. Many folks will tell you to wrap your connections with electrical tape - DON'T DO THAT! While it can keep moisture out in some cases, it is more likely to trap moisture IN - condensation build-up inside those wrapped connections is extremely common and why professionals don't wrap connections with electrical tape.
Finally, you need to manage your cords to keep people safe. Never run extension cords across driveways or sidewalks where they can be tripped on or driven over. It’s a huge hazard. If you absolutely must cross a walkway, use a heavy-duty cord cover designed to protect both the wire and your visitors' ankles.
For a complete rundown of all the critical safety checks, our ultimate Christmas light safety guide is an in-depth checklist you'll want to review. Following these protocols is what ensures your spectacular display is a source of joy, not a headache.
Before you climb that ladder, it's crucial to have the right gear on hand. A little preparation goes a long way in making sure your installation day is both productive and, more importantly, safe.
Here's a quick checklist of the essential tools and safety equipment we recommend for any Christmas light project.
Essential Safety Gear and Tools
| Tool/Gear | Purpose | Pro Tip |
|---|---|---|
| GFCI Outlet Tester | Verifies that your outdoor outlets have working GFCI protection. | Test every outlet before you plug anything in. A faulty GFCI is as bad as having no GFCI at all. |
| Sturdy Ladder | Provides safe access to roofs, gutters, and high branches. | Always have a spotter. Make sure the ladder is on level, solid ground and never overreach. |
| Ladder Stabilizer | Attaches to your ladder to prevent it from slipping or tipping. | This is a must-have for working on gutters or rooflines. It provides a much more secure base. |
| Heavy-Duty Gloves | Protects your hands from cuts, scrapes, and cold weather. | Insulated, waterproof gloves are a great choice if you're installing in chilly or wet conditions. |
| Weatherproof Connection Boxes | Encloses and protects plug connections from moisture. | These are fantastic for connections that will be sitting on the ground or exposed to the elements. |
| Zip Ties and Light Clips | Secures light strings and cords neatly and safely. | Use UV-resistant zip ties for outdoor use so they don't become brittle and break in the sun. |
Having these items ready before you start will make the entire process smoother and help you avoid common pitfalls and potential dangers. Safety isn't just a step; it's the foundation of a great display.
Even with the best Christmas light wiring diagram laid out on your workbench, questions are going to pop up. It happens to everyone, from first-timers to seasoned pros. Unexpected little issues are just part of the installation process.
Let's walk through some of the most common questions we hear from decorators. Getting these fundamentals right is the key to a display that's not only beautiful but, more importantly, safe for your family and home.
How Many Light Strings Can I Connect Safely?
This is, without a doubt, the number one question. The answer is simple and non-negotiable: check the manufacturer's tag. That little UL-certified tag dangling near the plug isn't a suggestion—it's a hard safety limit calculated based on the wire gauge and how much power the bulbs draw.
For instance, with classic incandescent C7 or C9 bulbs, you’re dealing with a lot of power. You can usually only plug two or three strings together before you’ve maxed out what the wire can handle. If you ignore that limit, the insulation on the wiring can get hot, melt, and become a serious fire hazard.
LEDs have completely rewritten the rules here. They use so little energy that connecting 20, 30, or even 40+ strings end-to-end is often perfectly safe. Your wiring diagram needs to reflect this, clearly marking where one run ends and a new one, powered by a separate extension cord, begins.
Why Do I Need a GFCI Outlet?
Think of a Ground Fault Circuit Interrupter (GFCI) outlet as your personal bodyguard against electric shock. It’s an incredibly smart device that constantly monitors the electrical current. The instant it senses a tiny imbalance—like electricity trying to go somewhere it shouldn't, such as through water or a person—it kills the power in a millisecond.
Using a GFCI-protected outlet for any outdoor decorating is an absolute must. In fact, it's required by national electrical codes for a reason. Rain, melting snow, even a heavy morning dew can create a path for electricity to cause serious harm. If your outdoor plugs aren't protected, you have to use a portable GFCI adapter. Plan for this; it’s a non-negotiable part of a safe display.
What Should I Do If My Breaker Keeps Tripping?
A tripping breaker isn't just an annoyance; it’s a critical warning. It means the system is working exactly as it should, cutting the power before the wires inside your walls can overheat and start a fire. A good wiring plan is designed specifically to prevent this from ever happening.
If your breaker trips, you've overloaded that circuit. It's that simple. Immediately unplug some of the lights. You need to go back to your power calculations and wiring diagram because you've asked that one circuit to do more work than it's rated for.
A breaker that keeps tripping is your home's way of screaming "Stop!" Don't ever get into a battle of resetting it over and over. You have to fix the root problem: the overload.
The fix is to spread the load out. Usually, this means running an extension cord from an outlet on a completely different circuit—maybe one in the garage or on the other side of the house. Planning when you put everything up can also give you a buffer to sort these power issues out without the pressure. In fact, you can learn more about timing your LED Christmas light setup in our guide to build in a stress-free installation window.
At The Christmas Light Emporium, we provide professional-grade lights, wiring, and accessories to help you create a safe and stunning holiday display. Explore our massive selection and find everything you need to bring your vision to life at https://thechristmaslightemporium.com.