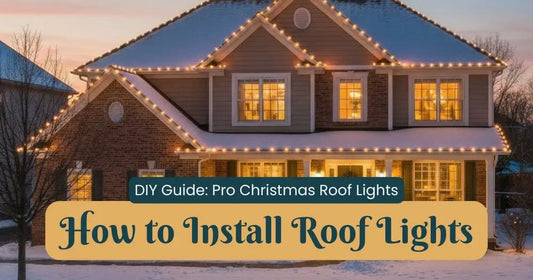
How to Attach String Lights to Your House Like a Pro
Nothing transforms an outdoor space quite like the soft glow of string lights. Whether you're setting the stage for a cozy family barbecue, elevating your backyard for a festive gathering, or simply after that magical, twinkly vibe to enjoy every evening, installing string lights can significantly enhance your home’s ambiance.
Before we dive into the “how-to,” it’s important to note that safety comes first. Always ensure the string lights you are installing are suitable for outdoor use and are plugged into a ground-fault circuit interrupter (GFCI) outlet to protect against electrical shorts. Now, let’s light up your world with step-by-step guidance designed for you, the DIY enthusiast, the outdoor lighting seeker, and the home decor lover.
Tools and Materials Needed
- Outdoor-rated string lights
- Measuring tape
- Light clips or hooks
- Ladder
- Hammer (if using nails or hooks)
- Screwdriver (if using screws)
- Drill (optional, for more permanent fixtures)
- Cable ties or zip ties (for securing extra wire)
Step 1: Plan Your Design
Firstly, visualize where you want your string lights to go. Consider pathways like from your home to a pergola or across a patio. Measure the length of this path to determine how many strands you'll need, ensuring to include a little bit of slack for a drooping effect if desired. Also, locate the nearest power source to ensure your string lights will reach.
Step 2: Choose Your Attachment Method
Evaluate your home’s exterior to choose the best attachment method for your lights. There are a range of options from adhesive-backed hooks, suction cup hooks, to more permanent fixtures like screw-in cup hooks or eye bolts. Light clips specifically designed for hanging string lights can be particularly handy and easy to remove when the season changes.
Step 3: Start the Installation Process
Begin by installing your chosen hook or clip near the power source and gently drape your lights between each attachment point. Make sure to maintain uniform spacing as you go along. If using nails or screws, pre-drill holes to avoid splitting wood trim or eaves. As you work, check that each light is securely fastened and replace any bulbs that are missing or not working.
Step 4: Extend to Your Desired Length
If you need to link multiple strings of lights together, do so cautiously. Never exceed the manufacturer's recommendation for how many strands to connect end-to-end, as this can pose a fire hazard. Double-check that your connections are tight and consider using electrical tape to add an extra layer of protection against moisture.
Step 5: Secure and Hide Extra Wiring
To keep things tidy, you may find yourself with extra wiring. Use cable ties to neatly bundle and secure any excess. Strategically place your lights and their wiring so that it blends seamlessly with your home's exterior, ensuring that the final outcome is both beautiful and safe.
Step 6: Step Back and Enjoy
Once all lights are attached and bulbs are working, step back and admire your work. As evening falls, plug in your string lights and watch as they cast a beautiful, inviting glow over your space.
String lights are more than just a decoration; they create an atmosphere, a warm ambiance that invites relaxation and enjoyment. The process of hanging your string lights can be straightforward if you follow these steps with attention to detail and safety. Remember, enhancing your home is not only about the end result but also the joy of creating something with your own hands. Now go forth, light up your home, and bask in the beauty of your DIY success!
---
For the daring decorators among us, consider integrating your string lights with other outdoor decor elements like climbing plants for a whimsical effect or draping them atop outdoor curtains for a luxurious, resort-like feel. The possibilities are as limitless as your imagination. Happy lighting!