Easy Christmas Light Installation – Quick & Beautiful Decor
Planning Your Holiday Display Like A Seasoned Pro
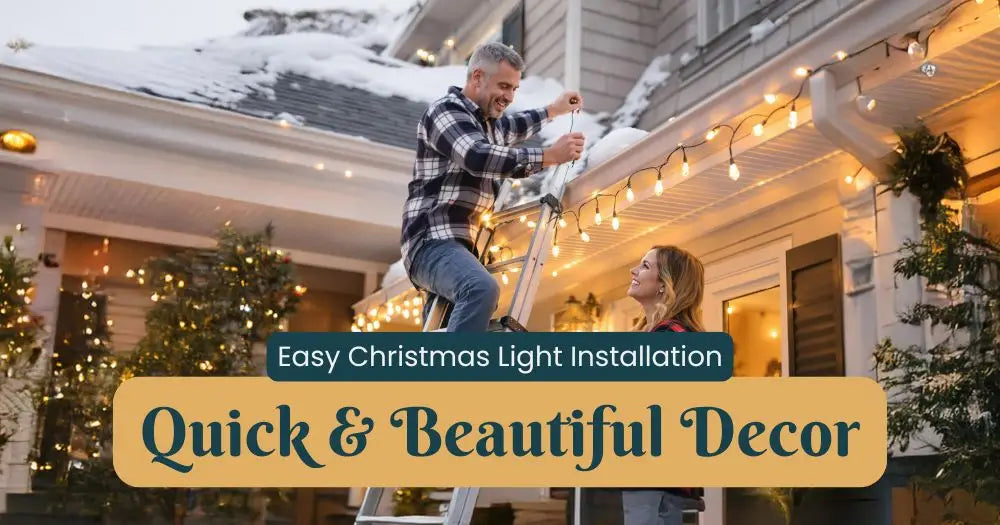
Before you even think about wrestling with that tangled mess of Christmas lights, let's talk strategy. Trust me, I've been there – tangled in lights, cursing under my breath, promising myself next year will be different. And it can be! The key is planning. A little forethought goes a long way in making your Christmas light installation smooth and (dare I say) enjoyable.
Assessing Your Canvas
Think of your house as a blank canvas. What are its best features? That stunning arched entryway? The charming bay window? Those are your focal points, the areas you want to highlight. For me, it’s my front porch. It’s the perfect spot for a cozy, inviting display. Don’t forget about your landscaping! Trees, shrubs, and walkways can all become part of your festive masterpiece.
Measuring and Mapping
Now for the less glamorous, but oh-so-important part: measuring. Grab a measuring tape and a notebook. Knowing the exact dimensions of your roofline, windows, and other areas is crucial. This will save you from that dreaded moment of realizing you're 10 feet short of lights (yes, I’ve been there!). Seriously, measure twice, buy once. It'll save you a trip back to the store in the holiday rush.
Powering Your Vision
Let’s talk electricity. Where are your outdoor outlets? How many strands of lights can each circuit safely handle? This is key to preventing overloaded circuits and blown fuses. It's especially important with LED lights. While they're incredibly energy-efficient, using a ton of them can still draw significant power. And speaking of the growing popularity of LEDs and elaborate displays, the global Christmas lights and decorations market is projected to hit $47.07 billion by 2033! Discover more insights into the Christmas light market. Knowing this, planning your electrical needs is crucial. Also, consider when you’ll be installing your lights. Early November, when the weather is still relatively mild, is much more pleasant than scrambling in the freezing December cold.
To help you choose the right lights, check out this handy comparison:
Christmas Light Types Comparison: A comprehensive comparison of different Christmas light types including LED, incandescent, and smart lights, covering factors like energy consumption, lifespan, and installation ease.
| Light Type | Energy Usage | Lifespan | Installation Difficulty | Cost Range |
|---|---|---|---|---|
| Incandescent | High | Short (around 1,000 hours) | Easy | Low |
| LED | Low | Long (up to 100,000 hours) | Easy | Medium |
| Smart LED | Very Low | Long (up to 50,000 hours) | Medium (requires app setup) | High |
This table highlights the key differences between the most common Christmas light types. While incandescent lights are the cheapest upfront, LEDs offer significant long-term savings due to their lower energy consumption and longer lifespan. Smart LEDs offer the most control and customization but come at a premium.
Planning ahead, from assessing your home's features to understanding your electrical capacity and choosing the right lights, lets you truly enjoy the process and create a holiday display that’ll make your home the envy of the neighborhood.
Choosing Equipment That Actually Makes Installation Easier
Let's be real, nobody enjoys wrestling with tangled lights and precarious ladders. Easy Christmas light installation isn't about muscle; it's about strategy. Trust me, the tools you choose can make or break the whole experience. My first year, I used some cheap clips I found at a discount store. Disaster. I spent more time untangling lights and re-clipping them than actually enjoying the finished product.
Now, I'm all about all-in-one clip systems. These things are lifesavers. They grip your gutters or shingles, like a champ, holding the lights securely without causing any damage. And they work with most standard light strands or commercial socket based bulb strings, which is a huge bonus.
Clips and Fasteners: Your Secret Weapons
Forget those flimsy plastic clips that snap the second you look at them. Invest in some durable, weather-resistant clips specifically designed for holiday lights. Look for ones that are easy to use and remove – you'll thank yourself when it's time to take everything down. Here's a pro tip: consider your siding material. Some clips are better for vinyl siding, while others are designed for gutters or shingles. You might find these 4 Tips for Hanging Your LED Christmas Lights helpful.
Ladder Alternatives: Reach New Heights Safely
Ladders. Just the word gives me the shivers. While they're sometimes unavoidable, consider safer alternatives like extension poles with light hanging attachments. These handy tools let you reach high spots without risking life and limb. I used to dread hauling out the ladder, but with an extension pole, I can reach the peak of my two-story house with ease. No more wobbly ladder adventures for me!
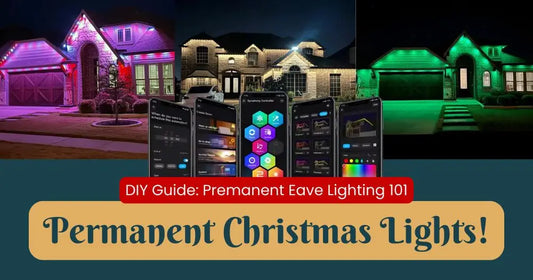
The Smart Lighting Revolution
Want to take your light display to the next level? Smart Christmas lights are where it's at. These lights connect to your Wi-Fi, allowing you to control colors, patterns, and even sync them to music from your phone. Talk about a simple way to add some serious magic to your display. It's interesting to note that the demand for easy and professionally installed Christmas lights has fueled the growth of the holiday light and decoration market, which hit a $7.2 billion valuation in 2021 and is projected to reach $10.73 billion by 2030. Find out more about the growth of the holiday light market. Smart lights are a huge part of this trend, offering both convenience and impressive visual effects. They might seem like a splurge, but the time and effort you save are worth it.
Choosing the right equipment turns Christmas light installation from a dreaded chore into a fun, festive activity. With the right tools, you can create a dazzling display without the stress and hassle.
Staying Safe Without Killing The Holiday Spirit
Let's be honest, nobody wants a holiday trip to the ER. But setting up your Christmas lights shouldn't require a hazmat suit either. Over the years, I've seen some interesting decorating techniques (let's just say, not all of them OSHA-approved). Trust me, holiday safety is more about common sense than extreme measures.
Electrical Safety: The Basics
Before you even think about untangling those twinkle lights, unplug everything. Seriously, double-check. I know it seems obvious, but it's surprisingly easy to get caught up in the festive frenzy and forget this crucial step. Once unplugged, give your lights a good once-over. Look for any frayed wires or broken bulbs – these little troublemakers can cause shorts or even fires. Just like professional photographers meticulously plan their headshot lighting setup, we need to use the right gear for our holiday displays. Make sure you're using properly rated extension cords to prevent any electrical mishaps.
Weather Wisdom: Working Smart in the Elements
December weather can be… let’s just call it uncooperative. If it's icy, raining, or even just super windy, postpone your decorating plans. It's simply not worth risking a fall. I speak from experience here. One year, I attempted to hang lights in a freezing drizzle. It wasn't pretty. Dress warmly in layers – you'll be more comfortable and less likely to rush the job.
Setting Up Your Workspace: Organization Is Key
A safe and efficient workspace isn't just about avoiding hazards, it's about setting yourself up for success. Think of it like prepping for a holiday feast - a little organization makes everything run smoother. Here are a few tips:
- Keep your ladder on a stable, level surface. Avoid placing it on soft ground or uneven pavement.
- Clear the area around your workspace of any obstacles that could cause trips or falls. Think stray garden gnomes, rogue toys, that sort of thing.
- Keep your tools and materials within easy reach so you’re not stretching or straining.
Check out this helpful guide on staying safe when you decorate for even more tips. A well-organized workspace makes decorating not only safer, but also more enjoyable. A little preparation goes a long way in preventing accidents and making the whole process a lot less stressful. Trust me, you'll thank yourself later.
Mastering Different Architectural Features and Challenges
Every house has its own personality, and your Christmas lights should complement it. Whether it's a charming bungalow or a grand Victorian, understanding your home's architecture is key to a smooth installation. For some extra pointers, check out our guide on how to hang Christmas lights.
Working With Dormers, Arches, and Other Unique Features
Dormers can be a bit fiddly. Instead of trying to outline them perfectly, try accenting the roofline around them for a subtler, more elegant effect. Arches, though? They're practically begging for a dramatic swag of lights! It really draws the eye and adds a touch of grandeur.
I've seen this firsthand. My neighbor's Tudor-style house looks amazing with lights outlining the half-timbering. But that same approach on my ranch house would look completely out of place. It's all about finding the right balance for your home.
Split-Level Solutions: Creating Cohesion
Split-level homes can present a unique challenge: how do you create a unified look across different levels? Maintaining consistent light colors and spacing across all levels is a great starting point. It ties everything together visually.
You can also use your landscaping to your advantage. Weaving lights through shrubs and trees helps bridge the visual gap between levels. Downlighting is another trick to consider. It highlights landscaping features and creates a warm, inviting feel without overwhelming the architecture.
Siding, Roofing, and Landscaping Considerations
Your home's exterior materials impact your lighting strategy, too. Smooth siding works great with adhesive clips. For rougher textures, you'll likely need clips designed for shingles or brick.
Your roofline also matters. Steep pitches are often easier to manage with light clips on extension poles, while shallower roofs might be more accessible with a ladder.
And don't forget about your landscaping! Wrapping trees and shrubs adds another layer of magic. Just make sure to use outdoor-rated lights designed for those environments.
Here’s a handy table to guide you based on different house features:
Installation Methods by House Feature
| House Feature | Best Installation Method | Recommended Tools | Difficulty Level | Time Required |
|---|---|---|---|---|
| Dormers | Accent roofline around dormers | Light clips, extension poles | Medium | 2-3 hours |
| Arches | Swagged lights | Zip ties, hooks | Easy | 1-2 hours |
| Split-Level | Consistent spacing and color, downlighting | Light clips, landscape stakes | Medium | 3-4 hours |
| Smooth Siding | Adhesive clips | Easy | 1-2 hours per section | |
| Rough Siding/Brick | Shingle or brick clips | Drill (if needed) | Medium | 2-3 hours per section |
| Steep Roof | Extension poles, light clips | Medium | 3-4 hours | |
| Shallow Roof | Ladder, light clips | Easy/Medium | 2-3 hours | |
| Trees/Shrubs | Wrapping with lights | Landscape stakes, zip ties | Easy | 1-2 hours per tree/shrub |
This table provides a general overview; the specific tools and time required will vary depending on the size and complexity of your house and landscaping.
By considering your home's unique features and choosing the right techniques, you can create a personalized holiday display that truly makes it shine. It's not just about hanging lights; it's about making your home sparkle!
Understanding Electrical Basics Without The Engineering Degree
Electrical work can feel a bit overwhelming when all you want to do is hang some festive lights. But trust me, getting a handle on the basics makes the whole process way less scary. We're not talking about becoming a certified electrician here, just picking up enough knowledge to decorate safely and confidently.
Power Calculations: Watts, Amps, and Why They Matter
Let's break down the power side of things. Each circuit in your house has a maximum amperage, kind of like its own personal limit. Go over that limit, and poof – tripped breaker. Think of it like a water pipe: too much water pressure and the pipe bursts. Overloading an electrical circuit is similar; it can cause overheating and, in the worst-case scenario, even a fire.
Most standard household circuits are either 15 or 20 amps. To figure out how many strings of lights your circuit can handle, you'll need to understand wattage, which is how much power each strand uses. There's a simple equation that helps with this: Watts / Volts = Amps. Standard household voltage is 120V. So, if you've got a 100-watt light strand, it'll draw roughly 0.83 amps. This tells us you could theoretically run about 18 of these strands on a 15-amp circuit (15 amps / 0.83 amps per strand = 18.07 strands). That being said, I always recommend staying about 20% under the maximum, just to be on the safe side.
Extension Cords: Using Them Wisely
Extension cords are lifesavers for Christmas light installations, but using them the wrong way can create hazards. First off, make sure you're using outdoor-rated extension cords. Before you even plug them in, give them a good once-over and check for any damage. Another important point: never chain multiple extension cords together. This actually reduces their capacity and makes them more likely to overheat. Instead, grab a single, longer cord, or maybe rethink your display layout and move it closer to a power outlet.
Timers and GFCI Protection: Safety First
Timers are a game-changer for automating your lights. When you're choosing one, make sure it’s rated for the total wattage of your lights. Some timers even come with photocells, which automatically switch your lights on at dusk and off at dawn. For outdoor setups, GFCI outlets (Ground Fault Circuit Interrupters) are absolutely essential. They’re designed to detect any electrical imbalances and immediately cut the power to prevent shocks. Think of them as your personal safety net. You might also find this helpful: How to wire Christmas lights safely and easily.
By understanding these electrical fundamentals, you can tackle your Christmas light installation with confidence and create a dazzling display that’s also safe. Armed with this knowledge, you're ready to build the light display of your dreams without the stress of electrical mishaps.
Solving Problems Before They Ruin Your Display
Murphy's Law seems to have a special fondness for Christmas lights. It feels like if something can go wrong, it absolutely will. But don't worry, troubleshooting these little hiccups is all part of the holiday decorating experience. Knowing how to tackle them is the key to a stress-free, festive season.
Troubleshooting Common Light Installation Issues
Let's face it, we've all been there: a section of lights goes dark, lights refuse to stay put, or the weather decides to wage war on our carefully crafted displays. One of the most annoying issues is when a whole string goes out because of a single burnt-out bulb. Thankfully, most modern lights have shunt resistors that prevent this. These little heroes keep the current flowing even with a dead bulb. The challenge then becomes finding the bad bulb! A bulb tester is an absolute lifesaver in this situation. It quickly pinpoints the culprit so you can swap it out and get your display back in action. And speaking of electricity, it's always a good idea to double-check safety. An electrical inspection checklist can give you peace of mind.
Repair Strategies That Last
Sometimes, a new bulb isn't the answer. Maybe a connection has wiggled loose or a wire has frayed (or, in my case, a squirrel decided to have a midnight snack on my wiring!). For these situations, waterproof electrical tape and wire connectors are essential. That squirrel incident? A bit of splicing and some waterproof tape, and the lights were shining bright again.
Know When to Replace, Not Repair
While DIY repairs are satisfying, sometimes replacing a faulty section is the smarter move. This is especially true for older lights showing serious wear and tear. Trust me, I've spent hours wrestling with tangled, ancient light strings – time I could have spent enjoying the holidays. It's just not worth the hassle when you can get new, more efficient lights at a reasonable price. It's remarkable how easy it is to find replacements these days, both online and in stores. In fact, the Christmas lights and decorations market is expected to hit $10.86 billion by 2032, partly because of this easy access. Learn more about trends in the Christmas decorations market. Upgrading is often the most practical option.
Preventative Measures and Maintenance
The best way to deal with light problems is to prevent them in the first place. Before you even hang your lights, give them a thorough inspection. Look for any damage or potential weak spots. Once they're up, regular check-ups can catch small issues before they turn into major headaches. Keeping your lights clean also helps them last longer. Dust and debris can trap heat and shorten bulb life.
By getting familiar with these troubleshooting and repair techniques, you can keep your holiday display shining brightly all season long. A little preparation goes a long way in preventing frustration and creating a truly magical holiday experience.
Storage And Maintenance That Sets You Up For Success
Easy Christmas light installation is only half the battle. The real win? A smooth setup next year. Trust me, I used to spend hours untangling lights, feeling like I was fighting a holiday kraken. Not anymore! A few simple storage and maintenance tricks have turned that pre-holiday chore into something almost enjoyable.
Taming the Tangle: Smart Storage Solutions
The secret to tangle-free lights? Organization. I'm a huge fan of clear plastic storage bins. You can see what's inside without digging around. Ditch those flimsy cardboard boxes that collapse after one season. Invest in sturdy bins built for garage life. Inside the bins, wind your lights around cardboard tubes (empty wrapping paper rolls work great!). This keeps them neat and prevents tangles. Here's a helpful article on how to store your LED Christmas lights. Another tip: label each bin with the location ("roofline," "trees," "windows"). This saves time and guesswork next year.
Protecting Your Investment: Storage Best Practices
Proper storage isn't just about organization; it's about protecting your lights. Store your bins in a cool, dry place, away from moisture and pests. Skip attics or basements, which can have temperature swings and humidity. A garage or storage closet is usually perfect. This will extend the lifespan of your lights, saving you money down the road.
Pre-Season Prep: Inspection and Testing
Before storing your lights, give them a quick once-over. Replace burnt-out bulbs and fix any damaged sections. I like to test them before packing them away to ensure everything is working correctly. This avoids frustrating surprises next year.
Weatherproofing for Longevity
Want your lights to last? Weatherproofing is key. Apply dielectric grease to all connections to prevent corrosion and use moisture protection accessories to protection outdoor connections. This small step makes a big difference in how your lights withstand harsh winter weather.
Seasonal Maintenance: Catching Problems Early
During the holidays, take a few minutes to check for loose connections or damage. Tighten any loose clips and replace burnt-out bulbs right away. This prevents small issues from becoming major headaches.
🎄 Happy Decorating!